Initially, security was not the primary focus for the website hosting an open-source hemodynamic software package. However, the addition of a federated learning server and web-based deep learning operations has underscored the importance of implementing robust security protocols. Leveraging the capabilities of Mac Studio with its Silicon chip remains a goal to enhance the performance of custom-built, web-based deep learning algorithms. Although this system is not essential, enthusiasm for Apple products has contributed to a commitment to this investment in the future. Currently, a Linux Debian server is in use; however, to gain a thorough understanding of security protocols, an initial transition to an older Mac Mini as a macOS server has been implemented. This allows for familiarity with macOS server operations before moving to the more advanced Mac Studio setup, which is planned as the dedicated machine learning server.
The transition to macOS aims to achieve more refined control over CPU memory and network resources, ensuring efficient management and preventing overuse by any single user. This shift ultimately supports the broader objective of facilitating and accelerating advancements in clinical hemodynamic research and development.
While sharing security strategies openly might not appear advisable, the limited availability of macOS security resources makes it worthwhile to contribute insights. After extensive trial and error on the current setup, a plan is in place to document and share successful security and optimization measures, following the final server transition. This documentation is intended to assist others who may encounter similar challenges in their server setups.
Homebrew
How to Install Homebrew on macOS
Homebrew is a popular package manager for macOS that allows you to install and manage software packages easily. Here’s a step-by-step guide on how to install Homebrew and why each step is necessary.
Step 1: Install Homebrew
To begin the installation process, open the Terminal application on your Mac. Then, run the following command:
(echo; echo 'eval "$(/opt/homebrew/bin/brew shellenv)"'): This command creates the string eval "$(/opt/homebrew/bin/brew shellenv)", which is needed to set up the Homebrew environment.
>> /Users/frank/.zprofile: Appends the string to the .zprofile file in the user's home directory (/Users/frank/). This ensures that the Homebrew environment is configured every time a new terminal session starts.
Persistence: By adding the command to your .zprofile, the configuration persists across terminal sessions. This means you don't have to manually configure Homebrew every time you open a new terminal window.
(2) Apply Homebrew Configuration Immediately
Next, run this command to apply the configuration immediately:
eval "$(/opt/homebrew/bin/brew shellenv)"
eval: This command evaluates and executes the command string that follows.
$(): Runs the command inside the parentheses and returns its output.
/opt/homebrew/bin/brew shellenv: Outputs the environment variables required by Homebrew, allowing you to use Homebrew commands right away.
Environment Setup: This command ensures that your current shell session knows where to find Homebrew and its installed packages. It sets the necessary environment variables, such as PATH, so you can use Homebrew commands without any issues immediately after installation.
Homebrew Directory Structure
Once installed, Homebrew uses a specific directory structure to organize its files and installed packages:
Key Directories:
/opt/homebrew/bin: Contains executable binaries for the installed packages. This directory is included in your PATH, allowing you to run commands without specifying the full path.
/opt/homebrew/Library: Contains Homebrew's core libraries and formulae that describe how to install each package.
/opt/homebrew/etc: Contains configuration files for installed packages.
/opt/homebrew/var: Stores variable data, such as databases or log files, related to installed packages.
macOS Python Environment Setup and Package Installation
(A) Check if Python is Managed by Homebrew
To determine if the Python installation on your macOS system is managed by Homebrew, follow these steps:
which python3
If the path returned is something like /usr/local/bin/python3 (for Intel Macs) or /opt/homebrew/bin/python3 (for Apple Silicon Macs), then Python is managed by Homebrew.
If the path is something else, such as /usr/bin/python3 or within a virtual environment like /Users/username/path/to/venv/bin/python3, then Python is not managed by Homebrew.
(B) Installing Python Packages if Python is Not Managed by Homebrew
If Python is not managed by Homebrew, you should use a virtual environment to install Python packages to avoid conflicts with the system-wide Python installation. Here’s how to do that:
Create a Virtual Environment
python3 -m venv path/to/venv
This command creates a virtual environment in the specified directory (path/to/venv). The venv directory will contain a copy of the Python interpreter and a local installation of pip. You can replace path/to/venv with your desired directory path.
A virtual environment is an isolated environment that includes its own Python interpreter and libraries, allowing you to manage dependencies separately for each project.
Activate the Virtual Environment
source path/to/venv/bin/activate
The source command runs the activate script, which modifies your shell’s environment variables to point to the Python interpreter and libraries within the virtual environment.
Activating the virtual environment ensures that all Python commands (like python3, pip, etc.) will use the Python interpreter and packages within the virtual environment.
Install Python Packages
python3 -m pip install PACKAGE_NAME
This command installs the specified Python package (PACKAGE_NAME) into the virtual environment.
Installing packages in the virtual environment ensures that they are only available within that environment.
This command restores your shell’s environment variables to their original state, effectively turning off the virtual environment.
Deactivating the virtual environment helps prevent accidental use of the isolated environment when you’re working on other projects.
Apple Remote Desktop
Configuring a Mac for Apple Remote Desktop
To ensure smooth access and control using Apple Remote Desktop (ARD), the Mac intended for hosting must undergo specific configurations. The following guidance provides a step-by-step outline for enabling remote management, configuring permissions, and ensuring necessary network accessibility.
(A) Enable Remote Management
Access System Settings: In System Settings (or System Preferences on earlier macOS versions), navigate to General and select Sharing.
Activate Remote Management: Check the box labeled Remote Management to enable the feature on the Mac.
Specify Remote Permissions: Selecting Options within the Remote Management settings allows for detailed control over remote capabilities. Options include allowing the remote user to observe, control, generate reports, or manage files.
(B) Set Permissions for Remote Access
Define User Permissions: Within the Remote Management settings, the Options button can be used to select specific permissions, such as Observe, Control, Generate Reports, and other available controls. Selecting OK finalizes the choice of permissions.
Restrict Access to Specific Accounts: For environments where remote access must be limited to certain individuals, selecting Only these users allows for the restriction of access to specific user accounts or groups.
(C) Required Network Ports for Apple Remote Desktop
To ensure uninterrupted functionality, the following ports must be opened on network firewalls and in relevant macOS firewall configurations:
Network Protocols:
Port Number
Protocol
Description
3283
ARD: TCP/UDP
Essential for Apple Remote Desktop’s core screen sharing and remote control functions.
5900
ARD: TCP
Facilitates VNC (Virtual Network Computing) operations, which ARD uses to enable screen sharing.
20, 21
FTP (File Transfer Protocol)
Transfers files between a client and server, with Port 21 for control and Port 20 for data.
22
SSH (Secure Shell)
Provides secure remote access and encrypted communication.
80
HTTP (Hypertext Transfer Protocol)
Transfers unencrypted web pages and resources.
443
HTTPS (Hypertext Transfer Protocol Secure)
Transfers encrypted web pages and resources using SSL/TLS.
8080
HTTP Testing
Commonly used as an alternative or test port for HTTP services, often for local development.
3389
RDP (Remote Desktop Protocol)
Allows remote access to Windows systems.
These configurations and settings collectively ensure that the Mac is accessible via Apple Remote Desktop for authorized users, enabling smooth management and screen sharing capabilities based on the permissions established.
SSH
macOS SSH Security Setup
This guide outlines the essential steps to secure SSH access on a macOS server using public key authentication.
1. Enable Remote Login on the Server
On the server:
Navigate to System Preferences > General > Sharing.
Select Remote Login to enable SSH access.
2. Generate an SSH Key Pair on the Client
On the client machine:
Open Terminal and execute the following command to generate an SSH key pair:
Accept the default location (~/.ssh/id_rsa) when prompted.
Set a secure passphrase.
Version I: For Windows users:
Store the key pair in C:\Users\YourUsername\.ssh.
Remove any existing SSH keys for the server:
ssh-keygen -R SERVER_ADDRESS
Test the SSH connection:
ssh SERVER_ADDRESS
If the username differs on the server, specify it as follows:
ssh USERID@SERVER_ADDRESS
Version II: SSH Key Setup for Windows
Key Storage Location
Store your SSH key pair in your user’s .ssh folder. For example, if your username is ngene, use:
C:\Users\ngene\.ssh
Unzipping and Verifying Key Files
After unzipping your SSH key files, open a Command Prompt.
Navigate to the .ssh folder and run the command below to display all files, including hidden ones:
dir /a
This step confirms that all key files have been extracted correctly.
Copying Key Files
If you encounter issues copying the files via the command line (for example, using copy .ssh C:\Users\ngene\. didn't work), use Windows Explorer to manually copy the four key files into the folder:
C:\Users\ngene\.ssh
Cleaning Up Old Keys
Before connecting, remove any existing SSH keys for the server to avoid conflicts:
ssh-keygen -R SERVER_ADDRESS
Replace SERVER_ADDRESS with your server’s address.
Testing the SSH Connection
Default Username:
Test the connection using:
ssh SERVER_ADDRESS
Different Username:
If your server username differs from your local one, specify it like so:
ssh USERID@SERVER_ADDRESS
Replace USERID with the appropriate username for the server.
3. Copy the Public Key to the Server
On the client machine:
Transfer the public key to the server:
ssh-copy-id SPECIFIC_ID@SERVER_ADDRESS
Replace SPECIFIC_ID with the appropriate username.
Replace SERVER_ADDRESS with the server's address.
4. Configure SSH on the Server
On the server:
Open the SSH configuration file with a text editor:
sudo emacs /etc/ssh/sshd_config
Update the following settings:
PermitRootLogin no
AllowUsers SPECIFIC_ID
AuthorizedKeysFile .ssh/authorized_keys
PasswordAuthentication no
ChallengeResponseAuthentication no
PermitEmptyPasswords no
UsePAM no
Ensure that SPECIFIC_ID is replaced with the desired username.
5. Restart the SSH Service
On the server:
Apply the changes by rebooting the system:
sudo shutdown -r now
Once you have set up SSH on your macOS server, you can connect to it using various SSH commands in the terminal. Here are three specific commands, each with a different option, along with their explanations:
1. Port Number
Use this command when the SSH server is configured to listen on a non-standard port. This is a common security measure to reduce the risk of automated attacks targeting the default SSH port.
ssh -p 2222 ID@SERVER
-p 2222: This option specifies the port number to use for the SSH connection. By default, SSH uses port 22, but sometimes servers are configured to use a different port for security reasons. Here, 2222 is an example of a custom port.
2. Authentification
Use this command when you have multiple SSH keys and need to specify which private key to use for authentication. It's also useful when connecting to a server that requires a specific key for authentication.
ssh -i ~/.ssh/id_rsa ID@SERVER
-i ~/.ssh/id_rsa: This option specifies the path to the private key file to be used for authentication. The ~/.ssh/id_rsa path is the default location where your private SSH key is stored after using ssh-keygen to create it.
3. Verbose Command
Use this command when you are experiencing issues with your SSH connection and need more detailed information to troubleshoot. Verbose mode helps diagnose problems by showing what happens during each step of the connection process.
ssh -v ID@SERVER
-v: This option enables verbose mode, which provides detailed output about the SSH connection process. It shows information about the key exchange, authentication, and other stages of the connection.
nginx
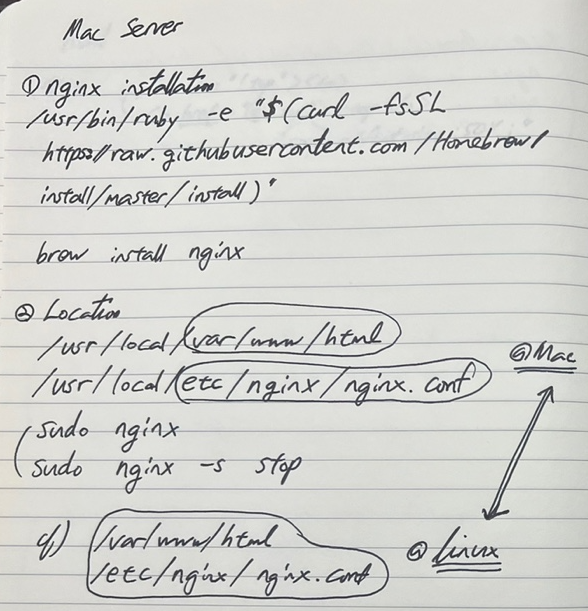
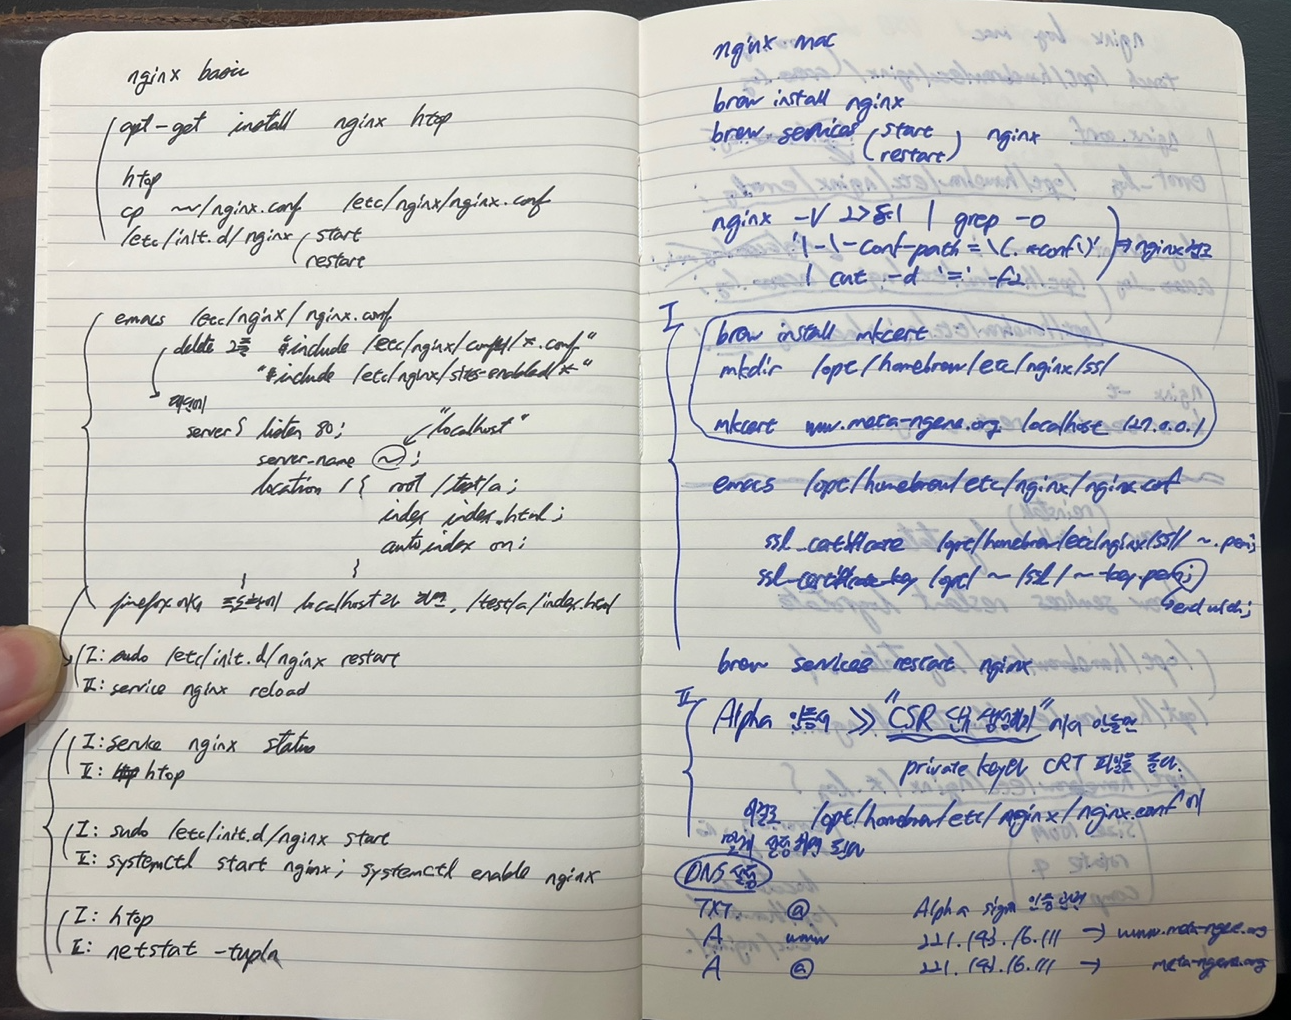
Nginx installation
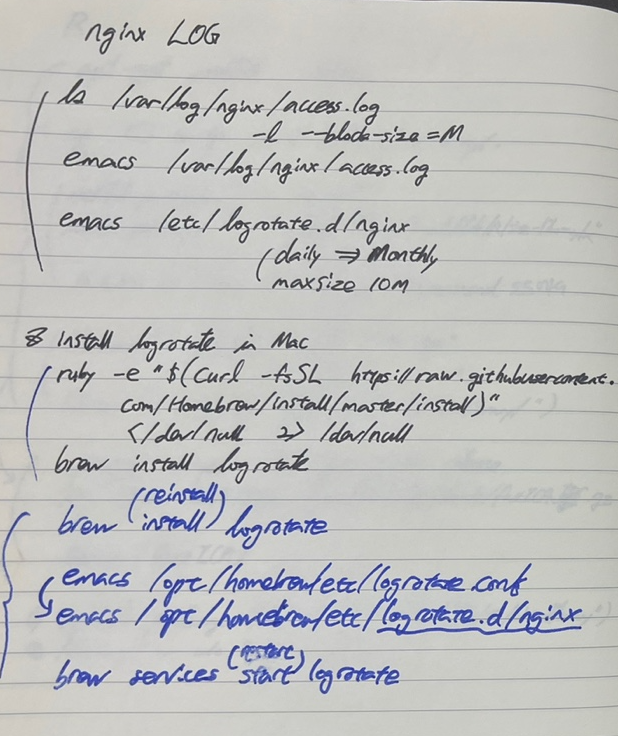
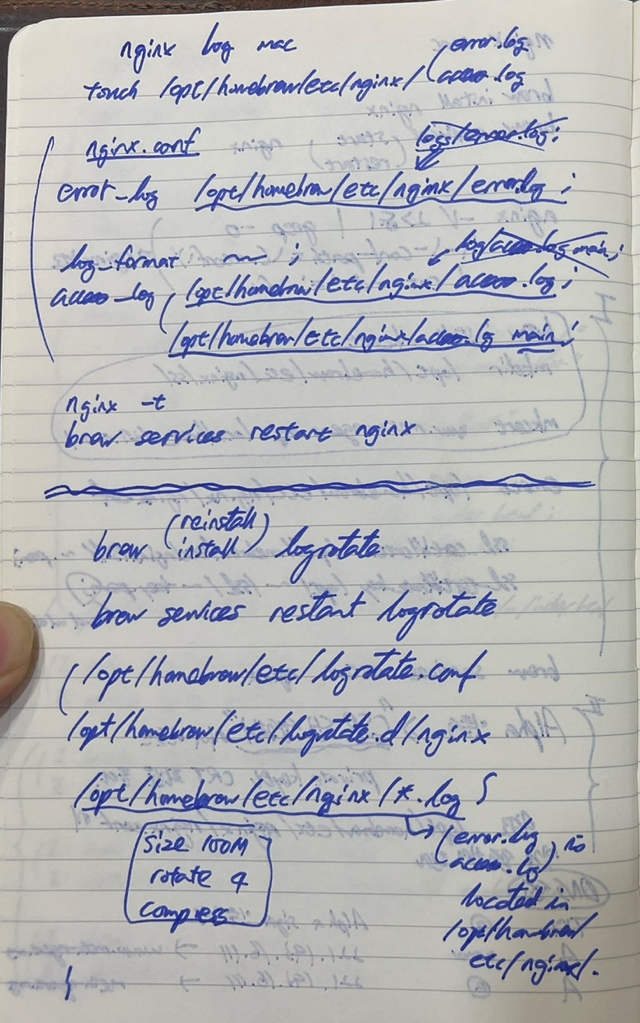
Nginx log
Nginx configuration with SSL certificate
macOS nginx Security Setup
Below is a structured example of your nginx.conf file, highlighting essential directives and their placement.
# /opt/homebrew/etc/nginx/nginx.conf

# Run worker processes as a non-privileged user for security
user nobody;

# Define the number of worker processes based on CPU cores
worker_processes auto;

# Events block configuration
events {
      worker_connections 1024; # Maximum number of simultaneous connections per worker
}

# Main HTTP block
http {
      # Log file paths for error and access logs
      error_log /opt/homebrew/etc/nginx/error.log;
      access_log /opt/homebrew/etc/nginx/access.log;
      # access_log /opt/homebrew/etc/nginx/access.log main;


      # Security headers to protect against common web vulnerabilities
      add_header X-Content-Type-Options nosniff;
      add_header X-Frame-Options SAMEORIGIN;
      add_header X-XSS-Protection "1; mode=block";
      add_header Strict-Transport-Security "max-age=31536000; includeSubDomains" always;

      # Hide Nginx version to prevent targeted attacks based on known vulnerabilities
      server_tokens off;

      # Limit the maximum allowed size of client requests
      client_max_body_size 10M;

      # Rate limiting zone definition to control traffic and protect against DoS attacks
      # Define a rate limiting zone with a rate of 1 request per second
      # limit_req_zone $binary_remote_addr zone=one:10m rate=1r/s;

      # Define a rate limiting zone with an increased rate of 20 requests per second
      limit_req_zone $binary_remote_addr zone=one:10m rate=20r/s;

      # HTTP Server Block
      server {
           listen 80;
           server_name localhost;

           # Deny access to sensitive locations
           location /secret {
                deny all;
           }

           # Main location configuration with rate limiting
           location / {
                root   html;
                index  index.html;

                # Apply rate limiting to this location
                limit_req zone=one burst=10 nodelay;
           }

           # Error page for server errors
           error_page 500 502 503 504 /50x.html;
           location = /50x.html {
                root html;
           }
      }

      # HTTPS Server Block
      server {
           listen 443 ssl;
           server_name www.ngene.org;

           # SSL/TLS settings for secure HTTPS connections
           ssl_certificate      /opt/homebrew/etc/nginx/ssl/ngene.crt;
           ssl_certificate_key  /opt/homebrew/etc/nginx/ssl/ngene.key;
           ssl_session_cache    shared:SSL:1m;
           ssl_session_timeout  5m;
           ssl_ciphers  HIGH:!aNULL:!MD5;
           ssl_prefer_server_ciphers  on;

           # Deny access to sensitive locations
           location /secret {
                deny all;
           }

           # Main location with enhanced security settings
           location / {
                root   html;
                index  index.html;

                # Rate limiting configuration
                limit_req zone=one burst=10 nodelay;
           }
      }
}
Detailed Explanation of Key Directives
1. User Directive
Runs Nginx worker processes as a non-privileged user. This minimizes security risks by restricting the access and permissions of Nginx processes, reducing potential damage if the server is compromised.
user nobody;
2. Worker and Event Settings
Automatically sets the number of worker processes based on available CPU cores, ensuring efficient resource use. The worker_connections setting controls how many simultaneous connections each worker can handle, balancing performance and load capacity.
These directives configure the logging behavior of Nginx, specifying the paths for error and access logs. They are usually found within the http block and apply globally unless overridden by server or location-specific settings.
Records server errors, warnings, and other important messages. It's crucial for diagnosing server issues, understanding failures, and ensuring the server is functioning correctly.
Regularly monitoring this log helps identify and troubleshoot configuration errors, server crashes, or other anomalies affecting server performance or security.
Access Log:
Path:/opt/homebrew/etc/nginx/access.log
Log Format:main
Captures details of each request made to the server, including client IP, request type, status code, and more. This log is vital for analyzing traffic patterns, detecting unauthorized access attempts, and maintaining a comprehensive record of server activity.
Use these logs for performance monitoring, identifying unusual traffic spikes, and conducting security audits. Analyzing access logs can reveal potential attack vectors or misconfigurations affecting user access.
X-Frame-Options SAMEORIGIN: Protects against clickjacking by restricting iframe usage.
X-XSS-Protection "1; mode=block": Enables browser XSS protection and blocks rendering of pages if an XSS attack is detected.
Strict-Transport-Security: Enforces HTTPS connections, preventing man-in-the-middle attacks by forcing browsers to use secure connections for a specified period.
5. Hiding Server Information
Hides the Nginx version in HTTP headers and error pages. This reduces the attack surface by preventing potential attackers from exploiting known vulnerabilities associated with specific Nginx versions.
server_tokens off;
6. Client Request Size Limitation
Limits the size of client request bodies to 10 megabytes, protecting against denial-of-service (DoS) attacks that attempt to overwhelm the server with large payloads.
client_max_body_size 10M;
7. Rate Limiting Zones
Both lines define a rate-limiting zone called one, using the client IP address ($binary_remote_addr) as the key. This is placed within the http block, setting a global rate-limiting policy.
# Define a rate limiting zone with a rate of 1 request per second
# limit_req_zone $binary_remote_addr zone=one:10m rate=1r/s;

# Define a rate limiting zone with an increased rate of 20 requests per second
limit_req_zone $binary_remote_addr zone=one:10m rate=20r/s;
1 Request per Second (rate=1r/s):
Purpose: Limits clients to one request per second. This very strict setting is effective for high-security environments where minimal traffic is expected, such as administrative interfaces or sensitive endpoints.
Use Case: Suitable for low-traffic applications where strict control over request rates is necessary to prevent abuse.
20 Requests per Second (rate=20r/s):
Purpose: Allows up to 20 requests per second per client. This setting balances security with user experience, making it suitable for standard web applications.
Use Case: Ideal for public-facing sites where a higher volume of legitimate traffic is expected, but protection against abuse and DoS attacks is still needed.
Trade-offs:
Stricter Rate (1r/s): Provides better protection but can hinder legitimate users if set too low for the expected traffic volume.
Higher Rate (20r/s): Offers more flexibility and a better user experience but requires careful monitoring to ensure it's not too permissive, potentially allowing DoS attacks.
8. Managing Traffic Spikes
The burst setting is designed to handle short spikes in traffic, providing a buffer that allows for occasional surges in requests without denying access to legitimate users. This configuration is suitable for applications where minor traffic surges are expected, such as during peak usage times, but where strict rate limits are still necessary to prevent server overload.
limit_req zone=one burst=5;
Zone:zone=one specifies the rate-limiting zone that has been previously defined using limit_req_zone. This zone configuration defines the rate limit, typically in requests per second (e.g., rate=20r/s).
Burst: The burst=5 setting allows for a temporary increase in the rate of incoming requests. This means that in addition to the defined rate limit, the server can handle an additional burst of 5 requests beyond the limit without immediately dropping them.
Trade-offs:
Advantage: Provides a moderate buffer for handling sudden spikes in traffic, improving user experience by preventing abrupt denial of service for slight overages.
Disadvantage: If traffic consistently exceeds the limit, this setting may not provide enough leeway, potentially resulting in dropped requests if the server cannot process the overflow quickly enough.
Comparison: burst=5 vs. burst=10 nodelay
Feature
burst=5
burst=10 nodelay
Burst Size
Allows 5 additional requests
Allows 10 additional requests
Processing
Queues extra requests
Processes extra requests immediately
Latency
Introduces some delay for bursts
No delay for processing burst requests
Use Case
Moderate spikes, more control
High spikes, immediate responsiveness
Resource Use
Lower risk of resource exhaustion
Higher potential for increased load
9. HTTP Server Block
server {
	listen 80;
	server_name localhost;

	# Deny access to sensitive locations
	location /secret {
	      deny all;
	}

	# Main location configuration with rate limiting
	location / {
	      root   html;
	      index  index.html;

	      # Apply rate limiting to this location
              limit_req zone=one burst=10 nodelay;
	}

	# Error page for server errors
	error_page 500 502 503 504 /50x.html;
	location = /50x.html {
	      root html;
	}
}
Listen on Port 80: Configures the server to handle HTTP traffic on port 80.
Deny Access to /secret: Protects sensitive areas of the site by denying all access to the /secret directory, preventing unauthorized entry.
Rate Limiting: Applies rate limiting to the main location, allowing a burst of up to 10 requests and processing them without delay. This balances security with user experience, preventing abuse while maintaining responsiveness.
Error Handling: Defines a custom error page for server errors, improving user experience during disruptions.
Certificates: Defines the certificate and key files for establishing secure connections.
Session Cache and Timeout: Enhances performance by caching SSL session parameters for 5 minutes.
Ciphers: Enforces the use of strong encryption algorithms, excluding those with known vulnerabilities.
Prefer Server Ciphers: Ensures the server's cipher preference is prioritized, maximizing security.
Deny Access to /secret: As in the HTTP block, access to the /secret directory is denied for additional protection.
Rate Limiting: Implements the same rate limiting as in the HTTP block, ensuring consistent protection against excessive requests.
Steps to Follow After Modifying nginx.conf
After you've made changes to your Nginx configuration file (nginx.conf), you'll need to verify, restart, and monitor your Nginx server to ensure everything is working correctly. Here’s how to do it:
Step 1: Test the Nginx Configuration
This command checks the syntax of your nginx.conf file to ensure there are no errors. It is a safe way to confirm that your changes are correctly formatted and won't cause Nginx to crash.
sudo nginx -t
Step 2: Restart the Nginx Service
This command restarts the Nginx server using Homebrew's service management tool. It applies the changes you've made in the nginx.conf file and restarts the service to ensure those changes take effect.
sudo brew services restart nginx
Step 3: Monitor Access and Error Logs
These commands allow you to view real-time updates to the Nginx access and error logs. This monitoring helps you track server activity and quickly identify issues that may arise after changes.
tail -f /opt/homebrew/etc/nginx/access.log
tail -f /opt/homebrew/etc/nginx/error.log
Access Log (tail -f /opt/homebrew/etc/nginx/access.log): Displays incoming requests to your server, including IP addresses, request types, response statuses, and more. It's useful for understanding traffic patterns and user interactions with your site.
Error Log (tail -f /opt/homebrew/etc/nginx/error.log): Shows error messages and warnings generated by the server. It helps in diagnosing problems, such as configuration errors or server crashes, that might occur after applying changes.
Step 4: Verify the Website's Response
This command sends a request to your website to retrieve the HTTP headers. It's a quick way to verify that your site is accessible and that the server is responding correctly after the restart.
curl -I https://ngene.org
Verifying the HTTP response ensures that your site is reachable and that the server is functioning as expected. If the response includes a status code like 200 OK, it means the server is correctly handling requests. If you receive errors like 404 Not Found or 500 Internal Server Error, it indicates issues that need addressing.
Setting Up Log Rotation for nginx Logs Using logrotate
This guide provides comprehensive instructions to configure log rotation for Nginx logs on macOS using logrotate. The process includes adjusting the system's PATH, creating necessary configuration files, testing the setup, and scheduling regular rotations to ensure efficient log management.
(A) Adjusting the System PATH
After installing logrotate via Homebrew, it may be observed that logrotate is not placed in the typical Homebrew installation paths (/usr/local/bin or /opt/homebrew/bin on Apple Silicon Macs). Instead, it is located in /usr/local/sbin. To make logrotate accessible from the command line, the system's PATH environment variable needs to include this directory.
Determine the Installation Path
Use the whereis command to locate logrotate:
whereis logrotate
The output should indicate the path as /usr/local/sbin/logrotate.
Update the PATH Environment Variable
Edit the shell profile to include /usr/local/sbin by using emacs to modify the .zprofile file:
emacs ~/.zprofile
Add the following line to the file:
export PATH="/usr/local/sbin:$PATH"
Save and exit the editor.
Reload the Shell Profile
Apply the changes by sourcing the profile:
source ~/.zprofile
(B) Creating Logrotate Configuration for Nginx
B-1) Creating Configuration Directories and Files
To set up logrotate after installation:
Create the Configuration Directory
Use the mkdir command with the -p option to create the necessary directories, including any parent directories that do not exist:
sudo mkdir -p /usr/local/etc/
Explanation: The -p option stands for "parents" and allows the creation of nested directories without error if they already exist.
Create the Main Configuration File
Create and edit the main configuration file using emacs:
sudo emacs /usr/local/etc/logrotate.conf
Define the Main Configuration
In logrotate.conf, include the following line to incorporate configurations from the logrotate.d directory:
# Example main configuration file for logrotate
include /usr/local/etc/logrotate.d
Create an Additional Directory for Modular Configurations
(Optional but recommended for organized configurations):
This configuration rotates the logs monthly and retains logs for twelve months.
Note: Adjust the path to the Nginx executable (/usr/local/bin/nginx or /opt/homebrew/bin/nginx) if it is installed in a different location.
(C) Testing the Logrotate Configuration
Run Logrotate in Debug Mode
Use the -d flag to check the configuration without making any changes:
sudo logrotate -d /usr/local/etc/logrotate.conf
Note: The debug mode prints messages to verify that the configuration is read correctly and shows what actions would be taken.
Force a Log Rotation
If the configuration is correct, force a log rotation:
sudo logrotate -f /usr/local/etc/logrotate.conf
Explanation: The -f flag forces logrotate to rotate the logs regardless of whether it thinks it needs to.
Verify Log Rotation
List the contents of the Nginx log directory to confirm that logs have been rotated:
ls -lh /opt/homebrew/etc/nginx/
Rotated log files such as access.log.1.gz and error.log.1.gz should be present.
(D) Scheduling Logrotate to Run Periodically
Scheduling logrotate to run automatically is essential to ensure that log files are rotated regularly without manual intervention. Regular log rotation prevents log files from consuming excessive disk space, maintains system performance, and ensures that log data is organized and manageable.
Understanding Logrotate's Operation
Logrotate as a Non-Daemon Process
Logrotate does not run continuously in the background as a daemon. Instead, it operates as a command-line tool that performs log rotation tasks when invoked. This design means that logrotate relies on external mechanisms to trigger its execution at desired intervals.
Execution Mechanism
When logrotate is executed, it reads its configuration files to determine which log files to process and how to handle them (e.g., rotation frequency, compression, retention). After performing the necessary actions, logrotate exits until it is called again.
Necessity of Scheduling Logrotate
Automatic Invocation
To achieve automatic and regular log rotation, logrotate must be scheduled to run periodically. Without scheduling, logrotate will not perform any log rotation tasks unless it is manually executed each time.
Role of Scheduling Tools
Scheduling tools like cron (or launchd on macOS) are responsible for invoking logrotate at specified intervals. These tools ensure that logrotate runs consistently without manual intervention, adhering to the rotation policies defined in its configuration files.
Why Scheduling is Essential
Consistency: Ensures that log rotation occurs regularly (e.g., daily, weekly), preventing log files from growing indefinitely.
Automation: Eliminates the need for manual execution, reducing the risk of human error and oversight.
System Performance: Helps maintain optimal system performance by managing disk space consumed by log files.
Compliance and Maintenance: Facilitates compliance with data retention policies and simplifies log management.
Implementing Scheduling with Cron
Given that logrotate does not operate as a daemon, setting up a scheduled task is crucial. Below is a concise overview of how to schedule logrotate using cron on macOS:
Edit the Crontab
Open the crontab editor:
EDITOR=emacs crontab -e
Add a Daily Cron Job
Insert the following line to schedule logrotate to run daily at midnight:
0 0 * * *: Specifies that the job runs daily at 00:00 (midnight).
/usr/local/sbin/logrotate /usr/local/etc/logrotate.conf: Command to execute logrotate with the specified configuration file.
Save and Exit
After adding the cron job, save the changes and exit the editor. The cron daemon will now handle the periodic execution of logrotate based on the defined schedule.
SSL Checker
Use our fast SSL Checker to help you quickly diagnose problems with your SSL certificate installation. You can verify the SSL certificate on your web server to make sure it is correctly installed, valid, trusted and doesn't give any errors to any of your users. To use the SSL Checker, simply enter your server's public hostname (internal hostnames aren't supported) in the box below and click the Check SSL button. If you need an SSL certificate, check out the SSL Wizard.
More Information About the SSL Checker
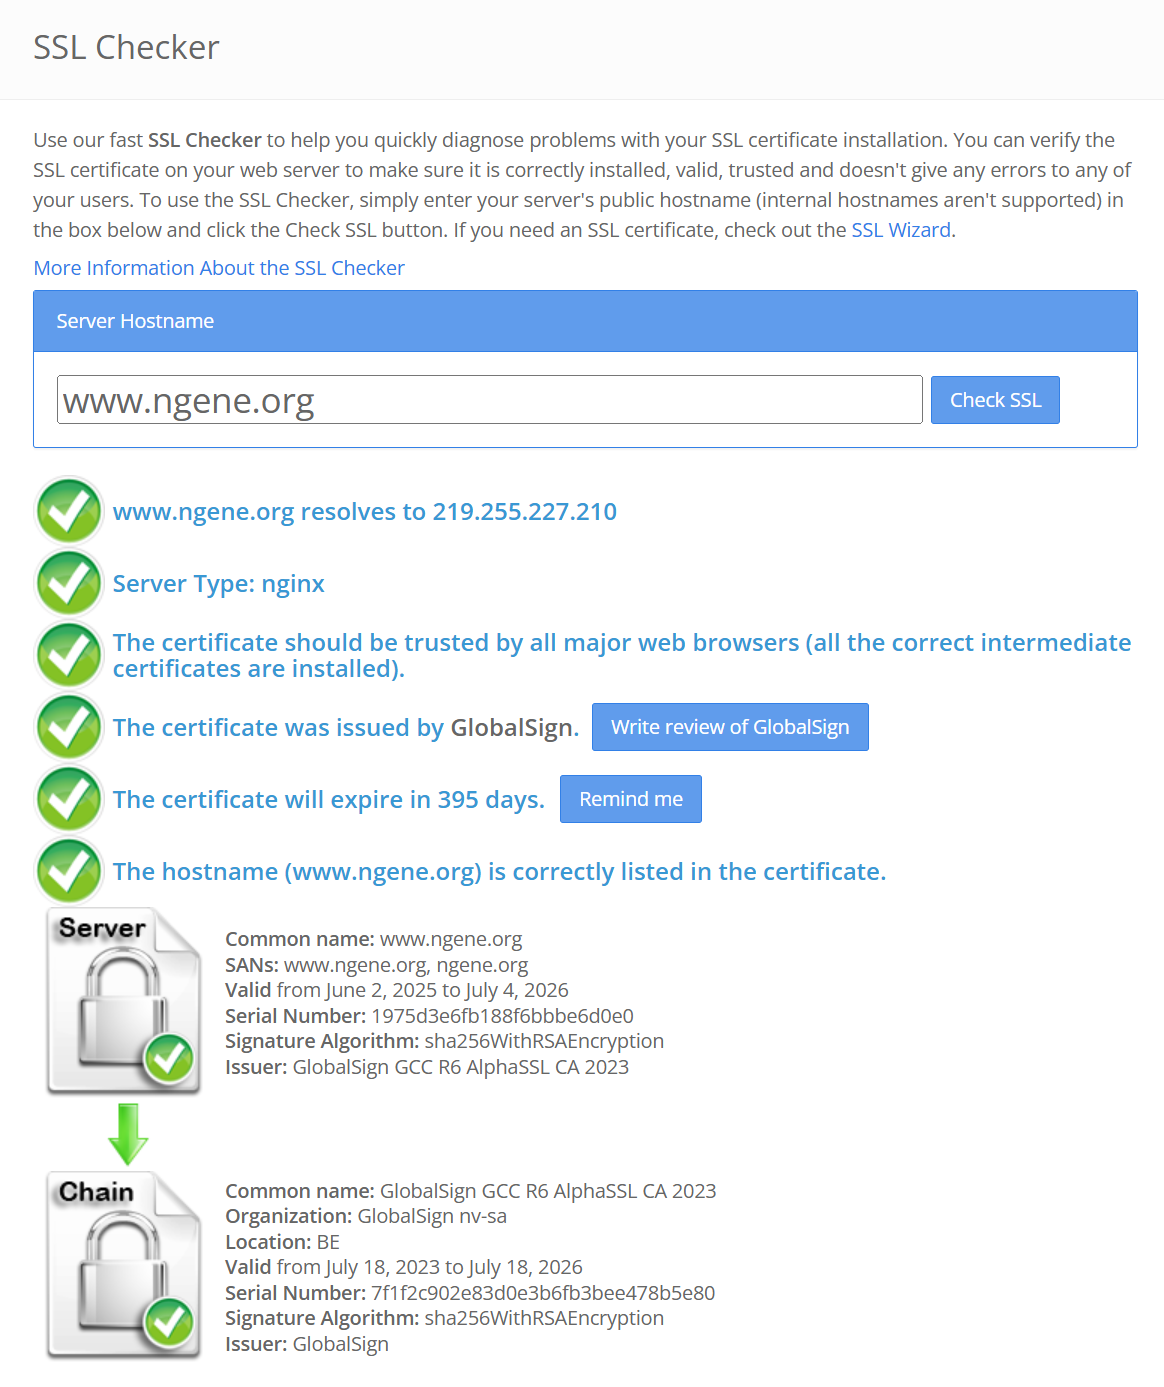
Server Hostname www.ngene.org
www.ngene.org resolves to 219.255.227.210
Server Type: nginx
The certificate was issued by GlobalSign.
The certificate will expire in 395 days.
The hostname (www.ngene.org) is correctly listed in the certificate. The certificate is not trusted in all web browsers. You may need to install an Intermediate/chain certificate to link it to a trusted root certificate. Learn more about this error. You can fix this by following GlobalSign's Certificate Installation Instructions for your server platform. Pay attention to the parts about Intermediate certificates.
Root cause
The server originally transmitted only its end-entity certificate. Browsers that lack the GlobalSign intermediate could not build a complete trust path and flagged the site as “not trusted.”
File roles in the trust chain
File
Purpose
Needed by client?
Directive
ngene.crt
Leaf/server certificate for www.ngene.org
Yes
ssl_certificate
www_ngene.org_chain_cert.crt
Intermediate certificate issued by GlobalSign
Yes
Concatenate after leaf inside file named by ssl_certificate
www_ngene.org_root_cert.crt
Root CA already trusted by browsers
No
Optionally referenced with ssl_trusted_certificate
Including the root with ssl_trusted_certificate is optional for browser trust yet valuable for server-side validation and OCSP stapling. Omitting it keeps the handshake lighter; adding it enables extra security features without harming clients.
Successful validation screenshot
Key takeaway 🗝️
Transmit the leaf plus intermediate certificates as the server chain and (optionally) configure the root locally for stapling. All modern browsers will then trust the site without warnings.
Written on June 4, 2025
fail2ban
Configuring fail2ban on macOS Silicon
fail2ban is a crucial security tool that helps protect your server from various types of brute force and malicious attacks by monitoring log files and banning IPs that show suspicious behavior.
fail2ban is an intrusion prevention software framework that protects computer servers from brute-force attacks. It works by scanning log files and banning IPs that exhibit malicious behaviors, such as too many password failures, seeking for exploits, etc.
Installation and Basic Setup
Installation Steps
1. Install fail2ban using Homebrew:
brew install fail2ban
2. Directory Structure:
Configuration files typically reside in /usr/local/etc/fail2ban/
Logs can be found at /usr/local/var/log/fail2ban.log
Configuration
(A) Copy the Default Configuration File
Create a local copy of the default configuration file.
You can add separate sections for monitoring authentication errors and access logs if they are for different types of issues or combine them if you want a unified approach. Here's an example configuration that includes both log files:
nginx-http-auth Filter:
Create or edit the filter file /opt/homebrew/etc/fail2ban/filter.d/nginx-http-auth.conf to match patterns related to authentication issues.
If you prefer to combine the monitoring of both logs under a single section, you can specify multiple log paths in the logpath directive. Here’s an example:
sudo fail2ban-client status sshd
      sudo fail2ban-client status nginx-http-auth
Unban an IP
sudo fail2ban-client set sshd unbanip <IP_ADDRESS>
View Logs
Check fail2ban logs:
tail -f /usr/local/var/log/fail2ban.log
Restart fail2ban
sudo brew services restart fail2ban
Web Security
DevTools Detection: Methods, Challenges, and Solutions for Securing Client-Side Interactions
(A) Detection Methods
A-1) Detecting DevTools via Window Dimensions
When DevTools are activated, especially when docked to the side or bottom of the browser window, they occupy a portion of the viewport. By continuously monitoring the discrepancy between window.outerWidth and window.innerWidth (as well as their height counterparts), it becomes feasible to infer the presence of DevTools based on significant differences in these dimensions.
Simplicity: The method is straightforward to implement, requiring minimal code without complex logic.
Non-Intrusiveness: Monitoring window dimensions does not directly interfere with user interactions unless DevTools are detected.
Cross-Browser Compatibility: This approach functions reasonably well across major browsers such as Chrome, Firefox, and Edge.
Caveats
False Positives: Users resizing their browser window or utilizing devices with varying screen sizes may inadvertently trigger detections.
DevTools Positioning: If DevTools are undocked into a separate window, this method may fail to detect them since the main browser window's dimensions remain unchanged.
Evasion Techniques: Advanced users can employ scripts or browser extensions to mask dimension changes, rendering this detection ineffective.
Using debugger, Statements
Intrusiveness: The use of debugger; statements triggers script pausing when DevTools are open, which can disrupt the user experience.
Easily Bypassed: Users can disable JavaScript or employ browser settings/extensions to prevent debugger; statements from halting execution, thereby nullifying the detection mechanism.
Manipulating Console Objects
Complexity: Overriding or hooking into console methods introduces complexity and can result in unintended side effects or bugs.
Reliability: Modern browsers and extensions can neutralize these manipulations, making detection unreliable.
Using MutationObserver
Performance Overhead: Continuously observing DOM changes can impose a performance burden, especially on devices with limited resources.
False Positives/Negatives: This method is not specifically tied to DevTools opening, leading to potential inaccuracies in detection.
A-2) Using Console Detection Techniques
One prevalent approach involves measuring the time required to execute specific code segments when DevTools are open. The rationale is that the activation of DevTools can impede JavaScript execution speed, thereby introducing measurable delays. By monitoring these discrepancies, it becomes feasible to infer the presence of DevTools.
(function() {
	    let devtoolsOpen = false;
	    const threshold = 160; // Adjust based on testing

	    const detectDevTools = () => {
	    const start = performance.now();
	    debugger; // Triggers DevTools to pause
	    const end = performance.now();

	    if (end - start > threshold) {
            devtoolsOpen = true;
            alert("Developer tools detected! Access is restricted.");
	    }
	    };

	    // Periodically check for DevTools
	    setInterval(detectDevTools, 1000);
	    })();
The debugger; statement causes JavaScript execution to pause if DevTools are active.
The time elapsed before and after the debugger; statement is measured.
If the delay surpasses a predefined threshold, it is inferred that DevTools are open, triggering an alert or other restrictive actions.
Caveats:
Users may disable debugger; statements or employ browser extensions that prevent such detections.
Frequent alerts or interruptions can degrade the user experience, leading to frustration among legitimate users.
A-3) Using the toString Method of Console
By overriding console methods and observing their behavior when DevTools are active, it is possible to detect the presence of DevTools. This method leverages property accessors to trigger detection mechanisms.
(function() {
	    let devtoolsOpen = false;

	    const element = new Image();
	    Object.defineProperty(element, 'id', {
	    get: function() {
	    devtoolsOpen = true;
	    alert("Developer tools detected! Access is restricted.");
	    }
	    });

	    console.log(element);
	    })();
An Image object is created, and a getter is defined for its id property.
When console.log(element) is executed, accessing the id property can trigger the getter if DevTools are open, setting devtoolsOpen to true and initiating restrictive actions.
Caveats:
This technique is heuristic in nature and may result in false positives.
Advanced users can bypass this detection by disabling certain JavaScript functionalities or using browser extensions.
A-4) Using MutationObserver to Detect DevTools Panel Changes
This method entails monitoring the Document Object Model (DOM) for changes that occur when DevTools are opened. By observing specific mutations, the presence of DevTools can be inferred.
(function() {
	    const element = new Image();
	    Object.defineProperty(element, 'id', {
	    get: function() {

	    // DevTools opened
	    alert("Developer tools detected! Access is restricted.");
	    }
	    });

	    // Trigger the getter by logging the element
	    console.log(element);
	    })();
Caveats:
Similar to console method detection, this approach is not foolproof and may lead to false detections.
Users with advanced knowledge can employ various techniques to prevent such detections from functioning correctly.
A-5) Advanced Detection with Breakpoints and Timers
Combining multiple techniques, such as setting breakpoints and utilizing high-resolution timers, can enhance the accuracy of DevTools detection. This method aims to reduce false positives by corroborating multiple indicators of DevTools activity.
Increased Complexity: Combining methods elevates the complexity of the detection script, potentially introducing new vulnerabilities or unintended behaviors.
User Experience Impact: Enhanced detection mechanisms may further disrupt the user experience, particularly if multiple detections are triggered simultaneously.
(C) Responding to Detected DevTools Usage
C-1) Redirecting to an "Access Denied" Page
Instead of attempting to close the browser window, redirecting the user to a dedicated "Access Denied" page provides a controlled and informative response to detected DevTools usage.
User-Friendly: Provides a clear and controlled message without forcibly disrupting the browser session.
Guidance: Directs users to a specific page where further explanations or instructions can be provided.
Considerations:
User Experience: Ensure that legitimate users, such as developers or accessibility testers, are not inadvertently redirected.
Bypass Potential: Users with advanced knowledge may find ways to circumvent client-side detections, rendering redirection ineffective.
C-2) Displaying an Overlay or Modal Message
Implementing an overlay or modal can effectively block interaction with the underlying content, conveying a message to the user without redirecting them to another page.
Immediate Feedback: Users receive instant notification without leaving the current page.
Customization: The overlay can be styled to align with the website's design and messaging requirements.
Considerations:
Accessibility: Ensure that the overlay is accessible to all users, including those utilizing assistive technologies.
False Positives: Users resizing their windows or employing multiple monitors may unintentionally trigger the overlay.
C-3) Informing Users Without Blocking Access
In certain scenarios, informing users about DevTools usage without restricting their access can maintain a positive user experience while conveying important messages.
Non-Intrusive: Users are informed without being blocked or redirected, preserving access.
User-Friendly: Maintains a positive user experience while still conveying important messages.
Considerations:
Visibility: Ensure that notifications are noticeable without being disruptive.
Customization: Tailor the notification's appearance and messaging to align with the website's tone and purpose.
Restricting Access to Webpages
Below is a structured comparison of commonly employed approaches for allowing only authorized users to view specific webpages. The methods are arranged from easiest to most complex, with a focus on highlighting security implications, scalability, and setup requirements.
Method
Description
Requirements / Language
Pros
Cons
1. Client-Side Scripts (JavaScript)
Relies on front-end checks or redirects to limit access.
Basic JavaScript/HTML files
Extremely simple implementation
No server-side code needed
Minimal setup
Very insecure; easy to bypass
Not suitable for sensitive data
Provides virtually no real protection
2. HTTP Basic Authentication
Uses server configuration (e.g., `.htaccess`) to prompt for credentials.
Web server configuration (Apache, Nginx)
Quick to configure
Lightweight
Supported by most web servers out-of-the-box
Minimal customization options
Rudimentary user experience
Reliant on HTTPS for secure credential transmission
3. Static File Password Protection (.htpasswd)
Restricts access to static files using password files.
Web server configuration (Apache)
Straightforward to set up
No additional scripting necessary
Suitable for a small number of protected pages
Manual password management
Limited user experience
Impractical for large or evolving projects
4. IP Whitelisting
Grants access only to a list of approved IP addresses.
Web server configuration (Apache, Nginx), firewall rules
Simple for restricted user bases
No user authentication code required
Easy to maintain for a small group
Unsuitable for dynamic or widespread user bases
Not user-friendly
Impractical for globally dispersed audiences
5. Session-Based Authentication
Manages user logins via server-side sessions (commonly in PHP).
Delegates user authentication to external providers (e.g., Google, Facebook).
Server-side code (PHP, Python, Node.js, etc.) plus OAuth libraries
Eliminates direct password storage
Users trust familiar providers
Highly scalable
Depends on external services
Integration and debugging are more involved
Token handling and user provisioning add complexity
10. Web Application Firewall (WAF)
Applies network-level restrictions and rules to incoming traffic.
WAF service (Cloudflare, AWS WAF, etc.), network infrastructure
Provides robust, configurable protection
Minimal changes needed in application code
Blocks common malicious traffic
Can be expensive for smaller projects
Requires specialized expertise to configure
Overkill for many basic use cases
Written on December 16th, 2024
Client-Side Scripts in JavaScript
Client-side scripts rely on the browser’s capability to execute JavaScript to determine whether access should be granted. This approach is inherently limited and insecure, as the underlying logic can be inspected and bypassed by individuals with basic knowledge of browser developer tools. Nevertheless, client-side restriction can serve as a lightweight gating mechanism for non-sensitive content or for demonstration purposes.
1. The Basic Concept
Client-side scripts typically utilize JavaScript functions that evaluate certain conditions, such as a password prompt or a localStorage token, before displaying the page content. Should a visitor fail the check, the script can redirect to another page or display an “Access Denied” message.
2. Example File Structure
A minimal HTML file (s1.html) might appear as follows:
<!DOCTYPE html>
<html>
<head>
    <meta charset="UTF-8">
    <title>s1.html - Client-Side Restricted Page</title>
    <script>
        function checkAccess() {
            // Simple prompt-based approach (not secure)
            var userResponse = prompt("Enter the secret code to view this page:");

            // Compare user input with the 'secret code'
            if (userResponse !== "SECRET123") {
                alert("Access Denied");
                window.location.href = "error.html";
            }
        }
    </script>
</head>
<body onload="checkAccess()">
    <h1>Secured Content</h1>
    <p>This is the protected content of s1.html.</p>
</body>
</html>
onload="checkAccess()": Triggers the checkAccess function upon loading the page.
prompt: Requests a password or code, which is compared to a hard-coded value, SECRET123.
alert and window.location.href: Redirect the user if the check fails.
3. Possible Refinements
Storing Credentials in localStorage: A script might store a token or pseudo-password in localStorage once the user is “validated.” Subsequent page loads would check for this token instead of re-prompting for credentials each time. However, this remains insecure, as localStorage is easily manipulated by knowledgeable users.
Hiding Content with JavaScript: Instead of redirecting, some implementations dynamically hide page elements until access is confirmed. While feasible, the hidden content still exists in the page source code and is thus discoverable with minimal effort.
Obfuscating the JavaScript: Basic obfuscation tools can convert the script into a less readable form. This measure adds a trivial layer of obscurity but does not offer true security.
4. Security Considerations
View Source: Browsers allow viewing and editing of client-side code, making any embedded credentials or logic visible.
Lack of Encryption: Communication of the “secret code” is not encrypted unless the page is served over HTTPS. Even then, the code is easily discovered in the HTML/JavaScript source.
Easily Bypassed: A simple removal or modification of the JavaScript check will grant access, meaning a determined user can bypass client-side protection with little effort.
Written on December 16th, 2024
HTTP Basic Authentication in Nginx on macOS
HTTP Basic Authentication presents a straightforward means of safeguarding web content by prompting for user credentials before granting access. On macOS, Homebrew installations of Nginx provide a convenient environment to apply this security mechanism to specific files, such as s1.html and s2.html, or to entire websites. The following sections outline the installation of Nginx, creation of a password file, configuration for protecting individual pages or an entire domain, troubleshooting permission-related issues, and managing htpasswd for user credentials.
1. Generating a Password File
The .htpasswd file holds usernames and password hashes for HTTP Basic Authentication. Various tools can create and modify this file; htpasswd from the Apache utilities is a common choice.
Install Apache Utilities (if not already present):
brew install httpd
Create the .htpasswd File in the Nginx configuration directory or another secure location:
2. Applying HTTP Basic Authentication to Individual Webpages
Securing specific files, such as s1.html and s2.html, involves adding location blocks within the server {} context in the Nginx configuration file. Typically, the main configuration file resides at /opt/homebrew/etc/nginx/nginx.conf.
Open the Configuration File:
sudo emacs /opt/homebrew/etc/nginx/nginx.conf
Insert Location Directives for each page that requires protection. For instance:
auth_basic defines the realm name shown in the authentication prompt.
auth_basic_user_file specifies the path to the .htpasswd file created earlier.
Protecting an Entire Directory
Why switch to a directory-level rule?
Maintaining one location block per file does not scale.
Nginx can instead match a whole URI prefix, so placing all protected assets beneath /secure/ lets a single rule cover every file you add.
^~ tells Nginx “use this prefix match and stop looking for more specific regex locations,” so URIs like /secure/drafts.html or /secure/reports/2025-05-01.pdf inherit the rule automatically.
The match is on the URI, not the filesystem path, so simply serve or alias files so they appear under /secure/….
Serving files from a different folder with alias
location ^~ /secure/ {
    alias /srv/protected_files/;      # note the trailing slash
    auth_basic "Restricted Area";
    auth_basic_user_file /opt/homebrew/etc/nginx/.htpasswd;
}
Save the Configuration and exit the text editor.
3. Applying HTTP Basic Authentication to the Entire Website
Instead of protecting individual files, the same directives may be placed in the main location / block to require credentials for all site resources:
To add new users or update passwords for existing users in the same .htpasswd file, run htpasswdwithout the -c (create) flag (omitting -c prevents overwriting the file):
Expect a login prompt. Enter valid credentials from the .htpasswd file to confirm proper authentication.
6. Troubleshooting Permission Errors
nginx -t
Generates the following example error:
nginx: the configuration file /opt/homebrew/etc/nginx/nginx.conf syntax is ok
nginx: [emerg] open() "/opt/homebrew/var/run/nginx.pid" failed (13: Permission denied)
nginx: configuration file /opt/homebrew/etc/nginx/nginx.conf test failed
Though the syntax is correct, Nginx cannot access or create the PID file at /opt/homebrew/var/run/nginx.pid due to permission restrictions. The following steps often resolve the issue:
Managing Nginx with Homebrew’s service commands ensures correct permissions and avoids conflicts:
sudo brew services restart nginx
nginx -t
Generates the following example error:
nginx: the configuration file /opt/homebrew/etc/nginx/nginx.conf syntax is ok
nginx: [emerg] open() "/opt/homebrew/etc/nginx/error.log" failed (13: Permission denied)
nginx: configuration file /opt/homebrew/etc/nginx/nginx.conf test failed
The following step may resolve the issue:
sudo nginx -t
Written on December 16th, 2024
HTTP Basic Authentication Persistence in Nginx on macOS
HTTP Basic Authentication is a straightforward and stateless method of controlling access to web resources. When enabled in Nginx—particularly on macOS—this protocol prompts for a username and password. Once valid credentials are provided, browsers often cache them to minimize repeated prompts. However, administrators and users may be uncertain about how Nginx (and the system itself) handles caching, whether the server “remembers” specific IP addresses or browsers, and how to reset cached credentials. This integrated guide compiles and refines multiple perspectives on Basic Authentication, covering its mechanics, security implications, and methods to reset cached credentials on macOS.
1. Clarification on HTTP Basic Authentication Persistence in Nginx
Nature of HTTP Basic Authentication
Statelessness
The mechanism does not maintain sessions. Each request to a protected resource must include the Authorization header containing Base64-encoded credentials.
The server (Nginx) treats each request independently.
Credential Transmission
Base64 encoding is used, but without encryption. HTTPS is strongly recommended to prevent credential interception.
Browsers typically auto-include the Authorization header for subsequent requests within the same session.
Security Considerations
Use TLS/SSL (HTTPS) to protect credentials in transit.
Without HTTPS, credentials can be intercepted, decoded, and exploited by malicious actors.
Basic Authentication on its own does not offer session management, token-based features, or multi-factor workflows.
2. Persistence of Authorized IP Addresses and Web Browsers
No IP-Based Authorization Memory
No Built-In IP Tracking
Nginx’s Basic Authentication module does not record or store IP addresses. Authorization decisions are based solely on the validity of the credentials in the Authorization header.
Separate IP-Based Access Control
IP-based allow/deny directives can be configured, but these are distinct from Basic Authentication and require explicit settings. For example, allow and deny directives can be added to the server block. This functionality does not integrate with Basic Authentication caching.
Browser Credential Caching
Session Caching
Browsers cache the provided username and password for the duration of the browsing session. This explains why a prompt appears once, and subsequent requests do not require the user to re-enter credentials.
Inherent Browser Behavior
Each request from the same browser session automatically includes the saved credentials. Closing or restarting the browser (or entering private/incognito mode) typically clears or bypasses that cache.
No Server Memory of Browser Type
Nginx does not track which browser or version a user is running. Authentication depends strictly on the credentials passed via the HTTP request headers.
3. Understanding Credential Persistence on macOS
How Credential Persistence Works
Browser Credential Caching
Modern browsers store credentials for the session, preventing repeated prompts.
The credentials remain cached until the session ends or the user clears browsing data.
Impact of Changing Computers or Browsers
Credentials entered on one machine do not carry over to another.
Different browsers on the same computer maintain separate caches. Using a different browser triggers a fresh login prompt.
IP Address Considerations
Stateless Authentication: Basic Authentication itself is not dependent on IP addresses.
Optional IP Restrictions: Nginx can be configured to permit or deny access from specified IPs, but this is a separate mechanism from Basic Authentication.
Security Implications
Convenience vs. Security
Browser caching reduces repeated prompts, improving user experience.
If a device is shared and credentials are cached, unauthorized users might gain access to protected resources.
Mitigation Strategies
Always enable HTTPS to encrypt credentials in transit.
Consider session-based or token-based authentication for advanced security needs (e.g., session expiration, multi-factor authentication).
Credential Updates
Modifying, adding, or removing authorized users is managed within the Nginx .htpasswd file. Updates immediately impact all clients attempting to access the resource.
4. Implications for Security and Management
No Permanent Memory of Clients
Because Basic Authentication is stateless, Nginx does not retain any memory or state about individual clients. Authentication is validated upon each request.
Enhanced Security Practices
Use HTTPS: Ensures credentials are not easily intercepted.
Consider More Advanced Authentication: For applications needing detailed session management or more robust security, methods such as OAuth, JWT, or other token-based systems are recommended.
Managing Credentials
Updates to the .htpasswd File: Revising user credentials in the .htpasswd file is necessary for changing access privileges.
5. Resetting Credential Caching in Nginx on macOS
Resetting credential caching ensures proper functionality when testing or validating HTTP Basic Authentication. Confirming the browser re-prompts for credentials is crucial when verifying security setups.
5.1. Use a Private/Incognito Window
Opening the protected resource in a private or incognito window prevents the browser from using previously cached credentials.
Google Chrome: File → New Incognito Window or Command + Shift + N
Mozilla Firefox: File → New Private Window or Command + Shift + P
Safari: File → New Private Window or Command + Shift + N
Microsoft Edge: File → New InPrivate Window or Command + Shift + N
5.2. Clear Browser Cache and Stored Credentials
Clearing cached data forces the browser to request new credentials:
Google Chrome
Settings → Privacy and security → Clear browsing data
Select All time and check Cookies and other site data and Cached images and files
Confirm by selecting Clear data
Mozilla Firefox
Settings → Privacy & Security → Cookies and Site Data → Clear Data
Check Cookies and Site Data and Cached Web Content
Safari
Safari (menu) → Preferences → Privacy → Manage Website Data → Remove All
Alternatively, remove only data for the specific site
Microsoft Edge
Settings → Privacy, search, and services → Choose what to clear
Select All time and check Cookies and other site data and Cached images and files
5.3. Restart the Browser
Completely closing the browser and reopening it may remove session-level cached credentials.
5.4. Use Different Browsers or Devices
Testing access from alternate browsers (Chrome vs. Firefox vs. Safari, etc.) or different devices ensures the credentials cache on one setup does not affect another.
Different Browsers: If initially using Chrome, try accessing the protected page with Firefox, Safari, or Edge.
Different Devices: Access the protected page from another computer or mobile device to ensure that the authentication prompt appears as expected.
5.5. Clear Saved Passwords (If Applicable)
Some browsers can store Basic Authentication credentials in their password managers:
Restarting macOS ensures all system processes (including the browser) terminate, clearing any stored authentication in RAM.
Save all work and close applications.
Restart the macOS system.
Open the browser and navigate to the protected webpage.
Written on December 17th, 2024
Token-Based Authentication
Token-based authentication (commonly using JSON Web Tokens, JWT) allows stateless verification of client requests. On macOS, Homebrew streamlines the installation of essential tools—such as Nginx, Python, and Node.js—while Emacs can serve as a capable text editor. When combined with HTTPS, token-based authentication ensures that credentials and tokens remain encrypted in transit. Below is a refined guide structured for macOS users leveraging Homebrew, Emacs, and Nginx.
Homebrew usually places the main configuration file in /usr/local/etc/nginx/nginx.conf or /opt/homebrew/etc/nginx/nginx.conf depending on the Apple Silicon or Intel environment.
Ensure Nginx proxies inbound HTTPS requests to port 5000.
Obtain tokens through the /login route and include them in Authorization headers for /protected calls.
4. Testing and Validation
Nginx Logs
Monitor /usr/local/var/log/nginx/access.log and /usr/local/var/log/nginx/error.log for HTTP status codes and error messages.
API Client Tools
Use tools like curl, Postman, or HTTPie to confirm successful token issuance and token-based access to protected endpoints.
Verify calls proceed over HTTPS by specifying https://example.local/login or similar domain.
Emacs for Ongoing Edits
Continue to manage configuration files (nginx.conf, server.js, app.py) from Emacs.
Reload Nginx and restart the Node.js or Flask application as code changes are made.
5. Best Practices
Encryption
Always serve content over HTTPS.
Use strong ciphers and modern SSL protocols.
JWT Security
Use robust secrets (e.g., environment variables) or a dedicated key management system.
Employ short token expiration times.
Consider implementing token refresh strategies and revocation lists for enhanced security.
Version Control
Keep configuration files (e.g., nginx.conf, application files) under version control (Git) for rollbacks and collaboration.
Scaling
Stateless JWT flows simplify horizontal scaling, as each server node only needs the same signing key.
Ensure load-balancer or reverse proxy configurations remain consistent.
Written on December 17th, 2024
Exploring Alternatives to NAS Solutions
Synology NAS vs. Custom Linux FTP Server
This guide offers a thorough comparison between Network Attached Storage (NAS) devices, such as Synology NAS, and custom-built Linux FTP servers. It carefully examines their features, security protocols, ease of use, and other essential factors to support well-considered decisions on secure and efficient data storage. Additionally, it provides a comparative overview of Synology NAS models, recommends suitable hard drives, outlines other NAS competitors, and presents insights into RAID configurations and best practices for enhancing server security when accessed externally.
NAS vs. Custom Linux FTP Servers
Network Attached Storage (NAS)
NAS devices are dedicated file storage units connected to a network, allowing multiple users and client devices to retrieve data from centralized disk capacity. Synology NAS stands out with its user-friendly interface, robust security features, and a range of applications for various needs.
Ease of Use: Simplifies setup and management with an intuitive interface.
Additional Applications: Provides multimedia streaming, backup solutions, and cloud synchronization.
Community and Support: Extensive documentation and an active user community for assistance.
Custom Linux FTP Server
Setting up a custom FTP server on Linux offers greater control and flexibility over system configurations and software choices. This option is ideal for users with advanced technical skills who require a tailored environment for specific applications.
Flexibility: Full control over software and hardware configurations.
Customization: Ability to tailor the system to specific needs, including custom scripts and applications.
Cost Efficiency: Potentially lower initial costs if repurposing existing hardware.
Security Considerations
Data Security in Synology NAS
Synology NAS devices come equipped with the DiskStation Manager (DSM) operating system, offering multiple layers of security:
Encryption: Supports data encryption at rest, securing stored files even if physical disks are compromised.
Secure Protocols: Utilizes FTPS, SFTP, and HTTPS to encrypt data during transmission.
Multi-Factor Authentication (MFA): Adds extra security by requiring multiple verification methods.
Regular Updates: Provides timely firmware and software updates to patch vulnerabilities.
Snapshot and Versioning: Allows point-in-time recovery of data, protecting against accidental deletions or ransomware attacks.
Security in Custom Linux FTP Servers
While a Linux FTP server can be secured, it requires manual configuration:
Secure Protocols: Implementation of SFTP or FTPS to encrypt data during transfer.
Firewall Configuration: Requires setting up firewalls to protect against unauthorized access.
System Hardening: Involves manual updates and security patches to maintain system integrity.
User Access Control: Needs careful management of user permissions and access rights.
Protocols and Their Security Implications
A variety of file transfer protocols are available, each with strengths and weaknesses. The following table compares these protocols to aid in selecting the most appropriate one for specific needs.
Protocol
Encryption
Security Features
Strengths
Weaknesses
Best Used For
FTP
None
Basic authentication
Simple to set up, widely supported
Transmits data in plaintext; vulnerable to interception
Legacy systems; non-sensitive data transfer
SFTP
SSH-based encryption
Secure authentication; data integrity
Strong security; encrypts all data and commands
Slightly more complex to set up than FTP
Secure file transfer over untrusted networks
FTPS
SSL/TLS encryption
Certificate-based authentication
Encrypts data; can use existing FTP infrastructure
Requires management of SSL certificates
Secure transfer needing FTP features
WebDAV
HTTP/HTTPS-based
SSL/TLS encryption; web-based authentication
Integrates with web servers; supports collaborative features
May require additional configuration for security
Collaborative file editing; web-based access
SMB/CIFS
Session encryption
User authentication; supports permissions
Good for local networks; integrates with Windows systems
Less efficient over WAN; complex firewall configuration
File sharing in local networks
Synology Drive
SSL/TLS encryption
End-to-end encryption; MFA; file versioning
Seamless Synology integration; cross-device sync
Proprietary; limited to Synology ecosystem
Secure, synchronized NAS file access
Synology Drive
Security: Encrypted connections, end-to-end encryption, and multi-factor authentication.
2-Bay Synology NAS Models Side-by-Side Comparison: DS223j vs. DS224+
Feature
DS223j
DS224+
Processor
Realtek RTD1619B Quad-core 1.7 GHz
Intel Celeron J4125 Quad-core 2.0 GHz (burst up to 2.7 GHz)
RAM
1 GB DDR4 (fixed)
2 GB DDR4 (expandable up to 6 GB)
Drive Bays
2
2
RAID Support
RAID 1, JBOD, Basic
RAID 1, JBOD, Basic
Network Ports
1 x 1GbE
1 x 1GbE
USB Ports
2 x USB 3.2 Gen 1
2 x USB 3.2 Gen 1
Max Storage Capacity
Up to 36 TB (2 x 18 TB drives)
Up to 36 TB (2 x 18 TB drives)
Encryption Engine
No
Yes (AES-NI)
Transcoding Capability
Basic media streaming
4K video transcoding support
Power Consumption
Low, optimized for home use
Moderate, suitable for multimedia use
Ideal For
Home users, basic storage needs
Small offices, advanced home users
Price Range
Low ($150 - $200)
Moderate ($300 - $350)
User Rating
4.0
4.5
"j": Entry-level models aimed at basic functionality and affordability, typically for home use.
"+": Higher-end models designed for enhanced performance, advanced features, and expandability, suitable for small businesses or advanced users.
RAID 1 Compatibility: Both models support RAID 1 configurations, allowing data mirroring across the two bays for redundancy and protection against data loss due to drive failure.
DS223j: Ideal for home users seeking a budget-friendly option for basic file storage and backups. It offers essential features but lacks the performance of higher-end models.
DS224+: Suited for small offices and advanced home users requiring enhanced performance, multimedia streaming, and expandability. Its more powerful CPU and expandable RAM make it versatile for demanding tasks.
Hard Drive Recommendations for NAS
Selecting the right hard drives is crucial for NAS performance and reliability. Drives designed specifically for NAS environments are recommended due to their enhanced durability and features.
Considerations When Choosing HDDs:
NAS-Specific Drives: Regular desktop drives are not recommended due to lower reliability in NAS environments.
Workload Rate: Ensure the drive supports the required workload rate for continuous operation.
Capacity Needs: Balance between current storage needs and future expansion.
Warranty and Support: Consider drives with longer warranties for added peace of mind.
Detailed Comparison of 8TB Hard Drives
The table below provides a comprehensive comparison of five 8TB drives from Seagate, Western Digital, and Synology, each offering unique features for different usage environments. This comparison includes key technical specifications, workload ratings, and other features to assist in selecting the most appropriate drive for NAS, enterprise, or desktop use.
Feature
Seagate Barracuda ST8000DM004
Seagate IronWolf ST8000VN004
Western Digital Ultrastar WD80EAAZ
Western Digital Red Plus WD80EFZZ
Synology HAT3310
Intended Use
Desktop computers
NAS systems up to 8 bays
Enterprise/Data centers
NAS systems up to 8 bays
Synology NAS systems
Rotational Speed
5400 RPM
7200 RPM
7200 RPM
5640 RPM
7200 RPM
Workload Rate
Not specified
180 TB/year
550 TB/year
180 TB/year
300 TB/year
Interface
SATA 6.0 Gb/s
SATA 6.0 Gb/s
SATA 6.0 Gb/s
SATA 6.0 Gb/s
SATA 6.0 Gb/s
Cache
256 MB
256 MB
256 MB
256 MB
256 MB
Reliability
Standard desktop-grade
NAS-optimized with AgileArray technology
Enterprise-grade with vibration sensors
NAS-optimized with NASware 3.0
Enterprise-grade, DSM-optimized
Operating Temperature
0°C to 60°C
5°C to 70°C
5°C to 60°C
0°C to 65°C
5°C to 60°C
Warranty
2 years
3 years
5 years
3 years
5 years
Vibration Protection
No active vibration protection
Integrated RV sensors
Advanced vibration protection for RAID
No active vibration protection
Optimized for DSM RAID and enterprise stability
Power Consumption
Lower due to 5400 RPM
Moderate
Higher due to 7200 RPM
Moderate
Moderate to High
Noise Level
Lower due to slower rotational speed
Moderate due to 7200 RPM
Higher due to 7200 RPM
Lower due to 5640 RPM
Moderate to High
Price Range
Moderate ($150 - $180)
Moderate ($180 - $220)
High ($200 - $250)
Moderate ($180 - $220)
High ($200 - $250)
Best Used For
Desktop environments, single-drive setups
Home or small business NAS, up to 8 bays
Enterprise RAID, high workload, 24×7 operation
Home or small business NAS, up to 8 bays
Synology NAS environments requiring high reliability
Best for NAS: The Seagate IronWolf ST8000VN004 and Western Digital Red Plus WD80EFZZ are ideal for NAS applications, particularly in small to medium-sized setups. Both drives are optimized for 24×7 operation and include NAS-specific firmware (AgileArray for Seagate, NASware 3.0 for WD), enhancing compatibility and reliability within NAS environments.
Best for Synology NAS: For Synology NAS systems, the Synology HAT3310 offers seamless integration with Synology’s DiskStation Manager (DSM), making it the most compatible option. As an enterprise-grade drive, it also ensures durability and performance in demanding conditions.
Best for High Workloads and Enterprise Use: The Western Digital Ultrastar WD80EAAZ is designed for data centers and high-demand enterprise environments, with a high workload rating (550TB/year) and advanced vibration protection, which are essential for continuous, intensive RAID configurations.
Avoid Desktop Drives in NAS: While the Seagate Barracuda ST8000DM004 offers high capacity at a lower price, it lacks NAS-specific optimizations and vibration protection, essential for multi-drive NAS environments. This drive is better suited to desktop or single-drive environments rather than NAS use.
Detailed Comparison of 8TB Hard Drives
Seagate Barracuda ST8000DM004: Designed primarily for desktop use, this drive offers high capacity at a competitive price. It operates at 5400 RPM and is suitable for standard workloads. However, it lacks the features optimized for NAS environments, such as vibration resistance and firmware tailored for RAID configurations.
Western Digital Red Plus WD80EFZZ: Specifically engineered for NAS systems with up to 8 bays, this drive includes NASware 3.0 technology, enhancing reliability and compatibility. It operates at 5640 RPM and supports 24×7 operation, making it well-suited for continuous use in NAS setups.
Seagate IronWolf ST8000VN004: Built for NAS applications, this drive features AgileArray technology for optimized NAS performance. With a rotational speed of 7200 RPM, it offers higher performance, and supports continuous 24×7 operation. It includes vibration sensors to maintain reliability in multi-drive systems.
Synology HAT3310: An enterprise-grade hard drive designed by Synology for seamless integration with its NAS systems. Operating at 7200 RPM, it is optimized for use with Synology's DiskStation Manager (DSM) software. It offers high reliability and performance, tailored specifically for Synology NAS environments.
Brand and Model
Designed For
Key Features
Pricing*
Rating
Seagate Barracuda ST8000DM004
Desktop Computers
5400 RPM, High capacity, Standard workloads
Moderate ($150 - $180)
4.0
Western Digital Red Plus WD80EFZZ
Up to 8-bay NAS systems
NASware 3.0, 5640 RPM, 24×7 operation
Moderate ($180 - $220)
4.5
Seagate IronWolf ST8000VN004
Up to 8-bay NAS systems
AgileArray technology, 7200 RPM, 24×7 performance
Moderate ($180 - $220)
4.5
Synology HAT3310
Synology NAS systems
Enterprise-grade, 7200 RPM, Optimized for Synology DSM
High ($200 - $250)
4.5
Best for NAS: Western Digital Red Plus and Seagate IronWolf are ideal for most NAS setups due to their NAS-specific optimizations.
Synology Integration: Synology HAT3310 is recommended for users seeking maximum compatibility and performance with Synology NAS systems.
Avoid Desktop Drives: Using desktop drives like the Seagate Barracuda in a NAS is not recommended due to potential reliability issues.
Common RAID Configurations for Data Storage
Redundant Array of Independent Disks (RAID) technology combines multiple disk drives to enhance redundancy, improve performance, or both. Below are commonly used RAID levels and their primary attributes.
RAID Level
Data Striping
Parity
Number of Disks
Redundancy
Performance
Storage Efficiency
Ideal Use Cases
RAID 0
Yes
No
2+
None
High
100%
Gaming, graphic design
RAID 1
No
No
2+
High
Moderate
50%
Critical data backups
RAID 5
Yes
Single
3+
Moderate
Good
(N-1)/N
File and application servers
RAID 6
Yes
Double
4+
High
Good
(N-2)/N
Enterprise storage
RAID 10
Yes
Mirrored
4+
High
Very High
50%
Database servers
RAID 0 (Striping)
Data is striped across multiple disks without redundancy, enhancing performance but offering no data protection. Suitable for scenarios where speed is prioritized over data security.
RAID 1 (Mirroring)
Data is duplicated across disks, providing high redundancy. Ideal for critical data storage where data loss prevention is essential. Requires identical disks for optimal performance.
Using two identical disks is optimal for RAID 1 configurations to ensure:
Optimal Performance: Consistent read/write speeds without bottlenecks.
Storage Efficiency: Full utilization of disk capacity.
Reliability: Similar durability and lifespan reduce failure risks.
Ease of Maintenance: Simplifies replacement and ensures compatibility.
RAID 5 (Striping with Parity)
Data and parity are distributed across at least three disks, allowing recovery from a single disk failure. Balances performance, storage efficiency, and redundancy.
RAID 6 (Striping with Double Parity)
Similar to RAID 5 but with double parity, tolerating up to two disk failures. Suitable for enterprise storage requiring high data protection.
RAID 10 (Combination of RAID 1 and RAID 0)
Combines mirroring and striping, requiring at least four disks. Offers high performance and redundancy but at a higher cost and reduced storage efficiency.
Enhancing Security for Servers with External IP Access
When exposing a server to the internet via an external IP address, several measures should be implemented to enhance security:
Security Measures
Firewall and Port Restrictions:
Allow only necessary ports and services.
Implement IP whitelisting where possible.
Authentication and Access Control:
Enforce strong passwords and multi-factor authentication (MFA).
Use SSH key-based authentication and disable root login.
Implement role-based access control (RBAC).
VPN for Secure Remote Access:
Set up a VPN to prevent direct exposure to the internet.
Data Encryption (SSL/TLS):
Use SSL/TLS certificates for web services.
Encrypt all remote connections.
Regular Updates and Patching:
Keep the operating system and software up to date.
Enable automatic updates for critical patches.
Change Default Ports and Disable Default Accounts:
Change default service ports to non-standard ports.
Disable or rename default admin accounts to reduce attack vectors.
NAS Setup Without a Dedicated Computer
A NAS device does not require a dedicated computer and can operate as a standalone unit connected directly to a router.
Connecting NAS to a Router
Direct Connection: Connect the NAS to the router via Ethernet, making it accessible to all network devices.
Internet Access: The NAS can access the internet through the router for remote access and cloud services.
Router's Bandwidth: Utilizes the router's capacity for efficient data transfer across the network and internet.
Advantages: Provides centralized storage, reduces complexity, and leverages the router's capabilities without needing a dedicated computer.
Upgrading RAM in Synology DS224+
Expanding the RAM in the DS224+ can enhance performance for multitasking and handling larger data volumes.
Maximum Supported Memory: Up to 6GB total (2GB built-in + 4GB expansion).
Using official Synology memory modules is recommended to ensure compatibility and support.
Written on October 29th, 2024
Setting Up a Mac mini with Nginx as a Combined Web and File Server
Configuring a Mac mini to function as both a web server and a file server using Nginx optimizes resource utilization and enhances accessibility. This guide provides a structured approach to integrating file-sharing capabilities into the existing Nginx web server setup, ensuring secure and efficient access from macOS and Windows devices.
Objective: Reuse the current Nginx web server on the Mac mini to serve files, effectively creating a personal file server.
Benefits: Centralized management, efficient use of existing resources, and simplified access to files over the network or internet.
Step 1: Verify the Existing Nginx Web Server Setup
Ensure that the Nginx server on the Mac mini is properly configured and operational.
Check Server Status:
Open a web browser and navigate to http://localhost or the Mac mini's IP address.
Confirm that the default web page or any existing hosted content is visible.
Step 2: Organize Files for Sharing
Locate the Nginx Document Root:
The default Nginx document root is typically located at /usr/local/var/www or another specified directory in the Nginx configuration file (/usr/local/etc/nginx/nginx.conf).
To confirm, open the Nginx configuration file and locate the root directive, which indicates the document root.
Create a Directory for Shared Files:
Within the document root, create a new folder to store files for sharing:
mkdir /usr/local/var/www/shared_files
Organize files into subdirectories if needed for easy navigation.
Add Files to the Directory:
Copy or move files into the shared_files directory.
Organize further into subdirectories if desired.
Step 3: Adjust Permissions
Set Read Permissions:
Ensure that the Nginx server has the appropriate permissions to serve the files.
This command grants read access to others, allowing the web server to serve the files.
Step 4: Configure Nginx to Allow Directory Listing (Optional)
Modify Nginx Configuration:
Open the Nginx configuration file in a text editor:
sudo emacs /usr/local/etc/nginx/nginx.conf
Add the following location block to configure directory listing for the shared_files folder:
location /shared_files/ {
    autoindex on;
    alias /usr/local/var/www/shared_files/;
}
Save the changes and exit the editor.
Restart Nginx:
Apply changes by restarting Nginx:
sudo nginx -s reload
Step 5: Accessing the Shared Files
Local Access:
On the same network, open a web browser and enter http://[Mac_mini_IP]/shared_files/ to access files.
Remote Access:
If remote access is required, configure the router to allow external connections to the Mac mini’s IP on port 80 (HTTP) or port 443 (HTTPS if SSL is enabled).
Consider setting up a Dynamic DNS (DDNS) service to assign a domain name to the Mac mini's IP, facilitating easier remote access.
Step 6: Implementing Security Measures
Basic Authentication:
Enable basic password protection by creating a .htpasswd file and configuring Nginx for restricted access.
Create Password File:
Execute the following command in Terminal to create a password file:
Open System Preferences > Sharing and check the box next to File Sharing.
Configure Shared Folders:
Click the Options button and ensure that Share files and folders using SMB is selected.
Add the shared_files folder to the list of shared folders.
Set Permissions:
Specify user access levels (Read Only, Read & Write) for each shared folder.
Access via SMB:
On macOS, access via Finder by navigating to smb://[Mac_mini_IP]/shared_files.
On Windows, open File Explorer and enter \\[Mac_mini_IP]\shared_files.
Step 8: Remote Access Configuration
Dynamic DNS Setup:
Register with a DDNS provider to associate a domain name with the Mac mini's IP address.
Router Configuration:
Port Forwarding:
Forward necessary ports (e.g., 80 for HTTP, 443 for HTTPS, 445 for SMB) to the Mac mini's local IP address.
Firewall Settings:
Adjust firewall settings to allow incoming connections on the forwarded ports.
Step 9: Maintenance and Monitoring
Regular Updates:
Keep macOS and Nginx updated to the latest versions to ensure security and performance.
Monitor Logs:
Check Nginx logs located in /usr/local/var/log/nginx/access.log and /usr/local/var/log/nginx/error.log for any errors or unauthorized access attempts.
Backup:
Regularly back up shared files and Nginx configurations to prevent data loss.
Written on November 10th, 2024
DS723+
Synology DS723+ Expansion and Configuration
The Synology DS723+ is a versatile 2-bay Network Attached Storage (NAS) device, ideally suited for the needs of small to medium-sized businesses. It offers options to expand and enhance its capabilities. This guide outlines the steps to expand storage capacity, optimize performance using SSD caching, compare it with similar NAS models, and mitigate data risks.
Expanding DS723+ Storage with Synology DX517
The DS723+ provides seamless expansion through Synology's DX517 expansion unit. The DX517 offers five additional drive bays, expanding the DS723+ to a total of seven bays, thereby enabling significant storage growth.
Purchase and Connect the DX517: The DX517 connects to the DS723+ via an eSATA cable and integrates into the Synology DiskStation Manager (DSM) environment. This setup offers plug-and-play functionality, allowing for immediate use and management.
Setup in DSM: Upon connecting the DX517, access the Storage Manager within DSM. The new drives will be detected, permitting configuration for additional storage volumes, RAID arrays, or backup purposes. DSM supports flexible RAID configurations, enabling the expansion of existing RAID volumes (where compatible) or the creation of new volumes with various RAID types for enhanced data security or performance.
Supported Configurations: The DX517 can be configured to support RAID levels compatible with the DS723+, offering flexibility for tasks such as archiving or high-performance storage.
Advantages of DX517 Expansion:
Enhanced Storage Capacity: Adding five more bays allows substantial storage expansion and provides increased data redundancy options with RAID.
Seamless Integration: Managed directly through DSM, the DX517 operates as if it were a native part of the NAS.
Hot-Swappable Drives: Drives in the DX517 can be replaced without downtime, facilitating maintenance and drive upgrades.
DS723+ SSD Caching Options
The DS723+ includes two M.2 NVMe slots specifically designed for SSD caching, which enhances performance in data-intensive environments:
Synology SNV3400 Series: Available in 400GB and 800GB models, these SSDs offer high endurance and reliability, optimized for NAS environments.
Third-Party Options: While third-party SSDs in the M.2 2280 NVMe form factor may be used, Synology’s SNV3400 is recommended for optimal DSM integration and reliability.
Installation and Setup: After inserting the SSDs into the M.2 slots, access Storage Manager > SSD Cache in DSM to configure the cache in read-only mode (for single SSDs) or read-write mode (for dual SSDs), based on performance requirements and risk tolerance.
When to Use SSD Caching
High Read-Write Workloads: Applications involving large file access, databases, or virtual machines benefit from SSD caching by reducing latency.
Multi-User Environments: Environments accessed by multiple users experience minimized bottlenecks through faster data retrieval.
Data-Heavy Applications: Demanding applications such as video editing or rendering gain increased speed and responsiveness.
When SSD Caching May Not Be Necessary
For users primarily utilizing the DS723+ for simple file storage, backups, or as a media server, the benefits of SSD caching are minimal, as standard HDDs can effectively handle such tasks.
Recommendations:
For High Performance: Pairing the DS723+ with Synology SNV3400 SSDs in a read-write configuration can effectively support demanding workloads.
For Data Safety: A read-only cache enhances read speed without the data loss risks inherent to write caching.
Ensuring Data Integrity with SSD Caching
SSD caching in write-cache mode presents certain risks, such as data corruption during unexpected shutdowns. Understanding these risks and implementing preventive measures is essential.
Potential Causes of Data Corruption
Power Outages: During a power loss, data temporarily stored in the write cache may be lost.
SSD Endurance and Failure: High write intensities can wear down SSDs, potentially leading to data inconsistency.
System Crashes: Incomplete data transfers due to crashes can result in corrupted or unusable files.
Mitigating Data Risks
Use ECC RAM: ECC (Error-Correcting Code) RAM, included in the DS723+, corrects minor errors in memory and is essential for data integrity in caching environments.
Enable Uninterruptible Power Supply (UPS): A UPS provides backup power, allowing the DS723+ to complete cache-to-disk transfers during power loss.
Select High-Endurance SSDs: Synology’s SNV3400 series includes power loss protection and high endurance, mitigating write failures.
Opt for Read-Only Caching: For read-heavy applications, read-only caching enhances speed without the write-cache risks, reducing the likelihood of corruption.
Regularly Monitor SSD Health: DSM offers health monitoring tools to track SSD wear, facilitating timely replacements when necessary.
Maintain Scheduled Backups: Regular data backups provide recovery options in case of hardware failure, offering an additional layer of protection beyond caching.
Comparison of Synology DS224+, DS723+, DS423+, and DS923+
The following comparison highlights four Synology NAS models, emphasizing their unique features and ideal use cases:
High, optimized for virtualization and data-intensive workloads
Encryption Engine
AES-NI hardware encryption
AES-NI hardware encryption
AES-NI hardware encryption
AES-NI hardware encryption
4K Video Transcoding
Yes
No
Yes
No
Expansion Capability
Not expandable
Expandable to 7 bays
Not expandable
Expandable to 9 bays
Power Consumption
Low
Moderate to high
Low
Moderate to high
Ideal Use Case
Home, small office, multimedia
Small business, virtualization
Growing businesses
Medium business, high-demand data tasks
DS224+: A cost-effective solution for home or small office use, featuring 4K transcoding and moderate performance for basic tasks.
DS423+: Suited for small offices with increased storage needs, providing four drive bays for larger media collections or shared files.
DS723+: Ideal for advanced users or small businesses requiring high-performance storage and expandability, suitable for virtualization and intensive applications.
DS923+: Excellent for medium businesses necessitating high-capacity storage, supporting up to nine bays and equipped with features for virtualization and high-demand environments.
Written on October 31st, 2024
Optimizing Synology DiskStation DS723+ with Memory and Cache Upgrades
The Synology DiskStation DS723+ is a versatile and upgradeable NAS solution, ideal for users seeking to enhance performance, responsiveness, and data handling efficiency. By upgrading both the RAM and SSD cache, the DS723+ can better handle demanding applications and deliver improved system functionality. The following offers a refined guide to optimizing the DS723+ with recommended memory and cache upgrades.
Memory (RAM) Upgrades: Specifications and Benefits
The DS723+ comes equipped with 2 GB of DDR4 ECC SODIMM memory by default. This can be expanded up to 32 GB by utilizing two memory slots, supporting a maximum of 16 GB per slot. The recommended specifications are:
Type and Voltage
Type: DDR4-2666 ECC Unbuffered SODIMM, 260-pin
Voltage: 1.2V
Recommended Memory Brands
Synology: The D4ES01-16G (16 GB) module is Synology’s official option, tailored for optimal performance and seamless integration.
Kingston: The Kingston Server Premier 16 GB DDR4-2666 ECC SODIMM (KSM26SED8/16HD) is widely compatible with the DS723+ and offers reliable performance.
Crucial: The Crucial 16 GB DDR4-2666 SODIMM (CT16G4SFD8266) is also known to function effectively within this system.
Users may choose to upgrade gradually by replacing the pre-installed 2 GB module with a single 16 GB module now, with the flexibility to add a second 16 GB module in the future to reach the 32 GB limit. Additional memory enables the DS723+ to handle increased workloads, improve multitasking, and enhance performance for virtual machines, Docker containers, and high-demand applications, offering smoother system operation and faster response times.
NVMe SSD Cache Upgrades: Specifications and Expected Improvements
The DS723+ includes two M.2 2280 NVMe SSD slots for optional SSD caching or high-speed storage expansion. Unlike the memory, there is no pre-existing SSD cache included with the DS723+, leaving these slots available for users who wish to enhance data access speeds. Synology recommends using their SNV3400 series NVMe SSDs for compatibility and optimal performance. The SNV3400 series is available in:
Available Capacities
400 GB and 800 GB capacities
Installing two equal-sized SNV3400 SSDs in the DS723+ provides several advantages:
1. Enhanced Data Access with SSD Caching
Using two SSDs as a read-write cache reduces latency and improves access times, especially for frequently accessed files. This is beneficial for users who require fast data retrieval in applications such as database hosting, file sharing, and multimedia streaming.
2. System Resilience with RAID Configurations
Configuring two SSDs in a RAID 1 setup offers data redundancy, protecting against data loss in case of drive failure. Alternatively, the SSDs can be combined for greater storage capacity if redundancy is not a priority.
3. Optimized Virtual Machines and Container Performance
Virtual Machine Manager and Docker benefit significantly from SSD caching, providing faster loading times and smoother operation. This setup is especially useful for users who rely on VMs or containers for application development or complex data processing tasks.
4. Efficient Multimedia Streaming and File Management
SSD caching greatly improves multimedia streaming quality by reducing buffering times and allows faster handling of large files, which is advantageous for media-centric environments.
5. Faster Backup and Restoration
By reducing read/write times, SSD caching speeds up backup and restoration processes, enhancing overall data management efficiency.
Adding two equal-sized Synology SNV3400 SSDs transforms the DS723+ into a high-performance storage solution capable of handling intensive tasks while offering flexibility to scale with future needs. This approach allows users to select configurations that best suit their demands, whether through SSD caching, data redundancy, or additional high-speed storage.
Conclusion
In conclusion, upgrading both memory and cache in the Synology DS723+ provides a versatile means of maximizing system performance and efficiency, making it an ideal solution for users with demanding storage and data access needs.
Written on November 5th, 2024
File System
Understanding Disks, Storage Pools, and Volumes in NAS Systems
A Network Attached Storage (NAS) system employs a hierarchical structure comprising disks, storage pools, and volumes to efficiently manage and safeguard data. Comprehending these components is essential for optimizing storage solutions and ensuring data integrity.
(A) Disks
Disks refer to the physical hard drives or solid-state drives (SSDs) installed within the NAS device. They provide the raw storage capacity necessary for data storage.
Disks serve as the foundational hardware elements upon which storage pools and volumes are constructed. The number and type of disks determine the overall storage capacity and potential performance of the NAS.
(B) Storage Pools
A storage pool is a logical grouping of one or more disks combined to create a substantial storage space. It abstracts the physical disks into a manageable entity.
Data Protection: Storage pools facilitate the implementation of RAID (Redundant Array of Independent Disks) configurations, offering data redundancy and fault tolerance.
Flexibility: They enable efficient management and expansion of storage resources by grouping disks together.
(C) Volumes
A volume is a logical partition within a storage pool, formatted with a file system where data such as shared folders, applications, and system files are stored.
Organization: Volumes aid in data organization by segregating different types of data or applications.
Management: They allow for setting quotas, permissions, and enabling features like snapshots and data deduplication.
Artificial Scenario: Creating Multiple Storage Pools with Different Disk Sizes
Initial Setup:
Disks: 2 x 12 TB disks.
Storage Pool 1:
Configured in RAID 1 with the 2 x 12 TB disks.
Volume(s): Created for critical data requiring high redundancy.
Adding New Disks:
Added Disks: 3 x 16 TB disks.
Storage Pool 2:
Configured in RAID 5 with the 3 x 16 TB disks.
Volume(s): Multiple volumes created for different purposes, such as media storage, backups, or less critical data.
Benefits:
Segmentation: Separation of data based on importance and access requirements.
Optimization: Utilization of larger disks for data benefiting from increased capacity.
Flexibility: Different RAID levels tailored to specific needs.
Written on November 2nd, 2024
Configuring Synology NAS for Internal-Only Access to Home and Homes Directories While Allowing Selective External Access
The home and homes directories on Synology NAS are intended as user-specific storage, separate from general shared folders. Designed primarily for internal use, these directories are restricted from external access by default, ensuring secure storage for individual data within the NAS. Meanwhile, access to other shared folders, such as nGeneNAS_Shared, can be selectively enabled for external connections. This guide provides a comprehensive approach to configure permissions, verify internal access, and allow external access only for specific shared folders.
Step 1: Enabling User Home Service for Internal Access
To ensure that each user’s home directory is accessible within the homes directory in File Station, the User Home service must be enabled. This service restores internal visibility of home directories following a system reset or configuration change:
Activate User Home Service
Go to Control Panel > User & Group.
Select Advanced on the sidebar.
Check Enable user home service and click Apply. This creates the home and homes directories if they were previously disabled, enabling access for authorized users in File Station.
Step 2: Configuring Permissions for Internal-Only Access
Permissions need to be configured carefully to maintain internal access for authorized users while restricting external access to homes.
Setting Permissions for Guest and External Users
Open Control Panel > Shared Folder and select homes.
Click Edit and navigate to the Permissions tab.
For Guest and any users designated for external access, set No Access. This ensures that external users cannot view or modify any contents within homes.
Assigning Permissions for Internal Users and Administrators
Ensure that internal users and administrators, including Frank, retain Read/Write access to the homes folder. This configuration allows each user to access their personal home directories while securing the homes directory from any external visibility or modifications.
In this setup, Guest and external users will be blocked from accessing homes as a whole, while internal users will retain access to their respective home directories within homes.
Step 3: Configuring External Access for Specific Shared Folders
To allow external access to nGeneNAS_Shared (or other shared folders designated for remote use), permissions and access controls can be configured separately:
Setting Permissions for External Access
Go to Control Panel > Shared Folder and select nGeneNAS_Shared.
Adjust permissions to grant external access only to trusted users or specific IP addresses. This approach allows selected shared folders to be accessible remotely, without compromising the security of the homes directory.
Step 4: Reinforcing External Access Restrictions
Additional security settings can further prevent unauthorized access to home and homes while allowing external access to designated shared folders:
Firewall Configuration
Navigate to Control Panel > Security > Firewall.
Set firewall rules to block external IPs from accessing home and homes, ensuring that these directories remain limited to internal access only. Configure exceptions as needed for shared folders intended for external access.
DSM Access Control Profile (DSM 7.0 and Above)
For DSM 7.0 and later, go to Control Panel > Application Portal and create an access control profile.
Configure the profile to restrict DSM access to LAN or trusted IPs, keeping home and homes inaccessible externally while selectively permitting access to other folders.
Limiting File Services for External Networks
In Control Panel > File Services, disable any file-sharing protocols (e.g., SMB, AFP, NFS) not needed for external networks. This ensures that only the designated shared folders, such as nGeneNAS_Shared, are accessible remotely, while internal directories like homes remain protected.
VPN Configuration for Secure Remote Access (Optional)
If remote access to NAS is required for internal directories, consider enabling a VPN server. This setup allows trusted users to access NAS directories over an encrypted connection, keeping internal folders like home and homes secure without direct internet exposure.
Step 5: Confirming Internal-Only Visibility in File Station
Once these configurations are complete, verify that the home and homes directories are visible only within the internal network and inaccessible to external IPs. To ensure settings are correctly applied:
Clear the browser cache, log out, and log back into File Station, or reboot the NAS if necessary. This refreshes permissions and visibility settings in File Station.
Written on November 2nd, 2024
Understanding the Distinction Between Admin and Frank Directories in Synology NAS’s Homes Directory
In Synology NAS, the homes directory serves as a centralized parent folder containing individual home directories for each user, including those with administrative privileges. When a user with administrative rights, such as Frank, is created, two specific directories within homes are noteworthy: the admin directory and the frank directory. Despite Frank’s administrative role, each directory has distinct purposes and access controls.
The Frank Directory: A Personal Home Folder for User-Specific Storage
Within the homes directory, the frank folder acts as a personalized home directory specifically for Frank. This folder is unique to Frank’s user account and is intended for storing his individual files, settings, and data. Access to this directory is restricted to Frank himself and any administrators authorized with the appropriate permissions, ensuring that Frank’s personal files remain secure and isolated from other users.
The Admin Directory: A Separate Home Folder for the Admin Account
The admin directory, also located within homes, is distinct from the frank directory. This folder serves as the home directory for the admin account, which is often created by default on Synology NAS systems. The admin folder is designated exclusively for the admin user account and holds data or settings specific to that account. Although Frank possesses administrative privileges, his personal data resides in his own frank directory, separate from the admin folder.
Key Distinction: Administrative Privileges vs. User-Specific Directories
This structure highlights the difference between having administrative rights and the organization of user-specific storage. Frank’s administrative privileges enable him to manage the NAS but do not alter the separation between his personal home directory (frank) and the system-created admin directory. This arrangement allows administrators to maintain individualized storage within their respective home directories while providing a secure and structured environment for data management on Synology NAS.
Written on November 2nd, 2024
External Access
Configuring External Access to Shared Folders on Synology NAS
A Synology Network Attached Storage (NAS) device facilitates the configuration of shared folders for external access. These shared folders serve as the primary means by which data is made available to users outside the local network. Files and directories not placed within these explicitly shared folders remain inaccessible to external Internet Protocol (IP) addresses, thereby enhancing the security of the system.
Understanding "home" and "homes" Directories
The Synology NAS features two distinct directories related to user data:
"homes" Directory: This directory acts as a centralized repository for individual users' personal folders. When the User Home Service is enabled, the "homes" directory is created. Within it, each user possesses a unique folder named after their username, ensuring the isolation of personal files.
"home" Directory: This refers to each user's personal folder within the "homes" directory. Upon logging in, users access their own "home" directory without visibility into other users' folders or the broader "homes" directory, thereby maintaining privacy.
An administrator account, such as "frank" with administrative privileges, has access to both the "home" and "homes" directories. This account can view and manage all user folders within "homes," while standard users can access only their individual "home" directories.
Making a User's Folder Accessible Externally
To provide external access to a specific user's folder (e.g., "frank"), it is advisable to create a separate shared folder rather than exposing the user's "home" directory directly. The following steps outline this process, substituting "FrankExternal" with nGeneNAS_Shared:
1. Create a New Shared Folder
Navigate to the Control Panel, select Shared Folder, and click Create.
Name the folder appropriately, such as nGeneNAS_Shared, and configure it as a new shared directory.
2. Set Folder Permissions
Assign read and write permissions to the user "frank" for the new shared folder.
Restrict permissions for other users unless additional access is required.
3. Enable External Access
In the Control Panel, go to External Access.
Configure remote access settings using methods such as QuickConnect, Dynamic DNS (DDNS), or port forwarding through the network router.
Ensure that the new shared folder is included in the external access configuration.
4. Link or Copy Files
Optionally, create a symbolic link (symlink) or manually copy files from "home/frank" to nGeneNAS_Shared.
This approach allows external access to specific files without exposing the entire "homes" directory.
By following these steps, the nGeneNAS_Shared folder becomes accessible to external IP addresses, providing controlled and secure access to the user's data.
Behavior of Shared Folders Outside "home" and "homes"
Shared folders created outside of the "home" and "homes" directories operate independently of the User Home Service. These folders:
Can be customized with specific permissions and access settings.
Are not associated with any particular user's "home" directory.
Can be configured for external access directly.
Serve as versatile storage locations for general data, collaborative projects, or files intended for a broader audience.
Placing data intended for external access into these shared folders helps maintain the integrity and privacy of the "home" and "homes" directories.
Methods for External Access
Several methods are available for enabling external access to a Synology NAS. Below is a comprehensive comparison, with the methods presented as header columns and various attributes compared across them.
Attribute
QuickConnect
Dynamic DNS (DDNS) with Port Forwarding
Virtual Private Network (VPN)
WebDAV
Ease of Setup
Very Easy Minimal configuration; enable in the Control Panel and register a Synology account.
Moderate Requires configuring DDNS in the Control Panel and setting up port forwarding on the router.
Moderate to Complex Requires setting up the NAS as a VPN server and configuring client devices.
Moderate Enabled through the Application Portal; requires configuration of ports and security settings.
Security Level
Moderate Synology manages the connection through its servers; data passes through third-party infrastructure.
Moderate to High Depends on strong authentication, SSL certificates, and secure port management.
Very High Encrypts all data traffic; prevents direct exposure of NAS services to the internet.
Moderate (High with HTTPS) Must use HTTPS to secure data; proper SSL certificate management is essential.
Privacy
Dependent on Synology's servers Relies on Synology for authentication and data routing.
Public-facing IP, configurable Direct access to the NAS; control over which ports and services are exposed.
Direct private connection All communications occur over a secure tunnel.
Direct NAS access with SSL Data is transmitted securely when HTTPS is used.
Functionality
Provides access to most NAS services without port forwarding.
Flexible access with a custom hostname (e.g., yourname.synology.me); full control over services.
Provides access to the NAS as if on the local network; supports all services.
Allows remote file operations (upload, download, edit); can map NAS as a network drive.
Best Use Cases
Ideal for casual remote access and users seeking simplicity.
Suitable for users needing flexible, persistent access and willing to manage security settings.
Ideal for accessing sensitive data; suitable for business environments requiring high security.
Suitable for remote file management and users needing to access files over standard protocols.
Drawbacks
Relies on Synology servers; data passes through third-party servers; potential speed limitations.
Potential vulnerabilities if misconfigured; requires careful setup to secure open ports.
Complex setup; may require additional software on client devices; potential impact on connection speed due to encryption overhead.
Limited to file access; complex HTTPS setup; performance may be slower compared to local access; compatibility issues.
Security Considerations
Shared Folder Access: Only files within explicitly shared folders are accessible externally. System directories, personal "home" folders, and other non-shared areas remain inaccessible unless specifically configured.
Potential Vulnerabilities:
DDNS with Port Forwarding: Misconfiguration can expose NAS services. Open ports must be secured with strong authentication and up-to-date protocols.
WebDAV: Without proper HTTPS configuration and authentication, data may be vulnerable.
Access to Non-Shared Directories
Even if a security breach occurs via DDNS with port forwarding or WebDAV, typically only the files within shared folders are accessible. Directories such as "home," "homes," and system files remain protected unless explicitly shared. However, if an attacker gains administrative access, there is a risk of altered permissions and broader data exposure. Therefore, maintaining robust security practices is crucial.
Configuring "homes" or System Directories for Sharing
Sharing the "homes" or system directories is generally discouraged due to inherent security risks. If necessary, the following steps outline how to configure these directories securely, ensuring that the "homes" directory remains protected:
1. Enable User Home Service
Access Control Panel > User > Advanced.
Enable User Home Service to create the "homes" directory.
This service ensures that each user has a personal "home" folder within the "homes" directory, maintaining privacy and isolation of user data.
2. Avoid Direct Sharing of "homes" Directory
Refrain from directly sharing the "homes" directory via Control Panel > Shared Folder.
Direct sharing can expose all user folders and sensitive system files to external access, increasing the risk of unauthorized access and data breaches.
3. Create Separate Shared Folders Outside "homes"
For data intended for external access, create specific shared folders outside of the "homes" directory.
Navigate to Control Panel > Shared Folder and create folders such as nGeneNAS_Shared.
Assign appropriate permissions to these folders, ensuring that only intended users have access.
4. Implement Symbolic Links (Advanced Users)
If access to specific data within the "homes" directory is necessary, consider creating symbolic links within the newly created shared folders.
Use Secure Shell (SSH) to create symbolic links pointing to specific directories or files.
Caution: Symbolic links can expose linked directories. Ensure that permissions are tightly controlled and that only trusted users have access to the shared folders containing symbolic links.
5. Restrict Permissions Strictly
In the Control Panel, carefully manage permissions for shared folders.
Grant read and write access only to necessary users.
Utilize features such as Two-Factor Authentication (2FA) to enhance security for accounts with access to shared folders.
6. Regularly Monitor and Update Security Settings
Keep the NAS firmware and applications up-to-date to protect against known vulnerabilities.
Regularly review access logs and permissions to ensure that no unauthorized access is granted.
Implement firewall rules and IP restrictions where applicable to limit access to trusted sources.
Recommendations
Use Designated Shared Folders: For external access, create specific shared folders like nGeneNAS_Shared and manage permissions accordingly.
Avoid Exposing Sensitive Directories: Do not share "home," "homes," or system directories unless absolutely necessary.
Implement Strong Security Measures:
Use strong, unique passwords and enable two-factor authentication.
Keep the NAS firmware and applications updated.
Use HTTPS with valid SSL certificates.
Configure firewalls and access controls appropriately.
Written on November 1st, 2024
A Step-by-Step Guide to Identifying Unauthorized Login Attempts on Synology NAS
To monitor and identify possible unauthorized login attempts on a Synology NAS, several logs and settings are available for effective tracking and management. Synology NAS includes tools for monitoring suspicious activities such as failed login attempts and access from unauthorized IP addresses. The following step-by-step guide outlines methods to identify potential login hacking attempts and enhance security measures.
1. Enable and Review Security Logs
Navigate to Control Panel > Log Center. (Install Log Center, if not available.)
Under Log Center, go to Log > System and examine the logs related to account activities.
Pay particular attention to repetitive failed login attempts or login activities from unexpected IP addresses.
Within the Security section, review entries for Failed Login and Account Lockout events. Multiple failed login attempts may suggest a brute-force attack, necessitating further investigation.
2. Utilize Security Advisor
Open Security Advisor from the Control Panel to perform a comprehensive system scan.
This scan can detect unusual login activities, configuration vulnerabilities, or other security issues.
Based on its findings, Security Advisor may suggest adjustments to strengthen the NAS’s security posture.
3. Inspect Connection Logs
Within Control Panel, go to Log Center > Connection to check for connection-related activities.
Examine this log for multiple failed login attempts from specific IP addresses, and observe the time-stamped entries for any signs of abnormal access patterns.
4. Enable Account Protection via Auto Block
Go to Control Panel > Security > Account and enable the Auto Block feature to prevent brute-force attacks.
This feature temporarily blocks IP addresses that exceed a certain number of failed login attempts within a defined period.
Configure the threshold for failed attempts and blocking duration according to security needs, and add known, trusted IP addresses to the allowlist to prevent accidental blocking.
5. Review Access from External Sources
If remote access is enabled, inspect the External Access logs to verify that only authorized IP addresses are accessing the NAS.
To further secure the NAS, consider restricting external access to trusted IP addresses only or disabling it entirely if not necessary.
6. Set Up Notifications for Suspicious Activity
Under Control Panel > Notification, configure email or SMS notifications for real-time alerts on suspicious activities.
Enable alerts for significant events, such as failed login attempts, to promptly receive notifications and address potential threats as they arise.
7. Advanced Option: Monitoring SSH Logins
For systems where SSH access is enabled, additional monitoring can be performed by logging in via SSH with an admin account and inspecting the system’s log files.
Within the /var/log directory, examine files like auth.log for any SSH login attempts from unauthorized IP addresses. This advanced measure helps in identifying potential security breaches through SSH.
Written on November 5th, 2024
DDNS
Configuring Synology NAS for Secure Remote Access with DDNS, Port Forwarding, SSL, and Local Access Control
This guide provides a structured approach to setting up Synology NAS for secure remote access, covering Dynamic Domain Name System (DDNS) setup, port forwarding, SSL certificate installation, and account access control. These steps ensure remote accessibility while protecting sensitive data and limiting specific account access to local networks only.
Essential Port Numbers for Synology NAS Configuration
To enable secure functionality, specific port numbers must be configured on the router for different NAS services. The table below details the necessary ports:
Service Category
Service
Port
Web Access (HTTP/HTTPS)
HTTP (non-secure access)
5000
HTTPS (secure access)
5001
File Services
SMB (Windows File Sharing)
445
AFP (Apple File Sharing)
548
FTP (File Transfer Protocol)
20, 21
FTPS (Secure FTP)
990
SFTP (SSH File Transfer Protocol)
22
Synology Drive and Cloud Station
Synology Drive Client
6690
Cloud Station Backup
6281–6300
Multimedia Services
Audio Station, Video Station, and Photo Station
5000 or 5001 (based on HTTP/HTTPS preference)
DSM Services (DiskStation Manager)
DSM Web Interface
5000 (HTTP) / 5001 (HTTPS)
It is advisable to enable only the necessary ports and prioritize HTTPS (port 5001) to protect data in transit.
Setting Up DDNS on Synology NAS
Configuring DDNS for the NAS allows for a consistent hostname that bypasses issues with changing public IP addresses.
Access DSM: Navigate to Control Panel > External Access > DDNS.
Create a DDNS Entry: Select Add, choose a DDNS provider (Synology offers a free service), and enter a hostname (e.g., yournasname.synology.me).
Save the Settings: Apply the settings, allowing remote access to the NAS through the hostname, for instance, https://yournasname.synology.me:5001.
Ensuring Correct Port Forwarding and SSL Signing
After forwarding the 5000–6000 port range to the NAS’s internal IP, verify the connection by accessing https://yournasname.synology.me:5001. To further secure this connection, it is recommended to configure an SSL certificate.
SSL Certificate Signing for Synology NAS
To enable a verified SSL connection, install an SSL certificate as follows:
Access Control Panel: Go to Control Panel > Security > Certificate.
Add a Certificate: Select Add, then choose Get a certificate from Let's Encrypt (or another trusted provider).
Enter Certificate Details: Provide the DDNS hostname (e.g., yournasname.synology.me) and email for notifications. Synology will automatically request and install the SSL certificate.
Apply HTTPS Settings: After installation, redirect all HTTP connections to HTTPS:
Go to Control Panel > Network > DSM Settings.
Enable Automatically redirect HTTP connections to HTTPS to ensure a secure connection.
Steps to Disable External Access for Specific Accounts
To further secure the NAS, disable external access for specific accounts (e.g., admin and frank) while allowing local access only.
Log in to DSM: Access DSM on the NAS through a local network connection.
Navigate to Security Settings: Open Control Panel > Security > Account.
Configure IP Access Rules: Under Login Protection or Account Protection (depending on DSM version), create an Access Control Profile:
Select Create or Add and enter the IP range for the local network (e.g., 192.168.1.0/24).
Apply this profile to restrict external access for specific accounts, such as admin and frank.
Confirm and save the profile.
Disable Default Admin for External Access:
Go to Control Panel > User and select the admin account.
Under Edit, select Allow login only from trusted devices and specify the local network range as trusted.
Alternatively, disable the admin account entirely if another administrator account is available for local access (recommended best practice).
Firewall Configuration (Optional): Configure the NAS firewall to block all external IP addresses from reaching ports 5000 and 5001 for the admin and frank accounts, while allowing the local network range.
Test Access Restrictions:
From outside the local network, verify that access to the admin and frank accounts is blocked.
Confirm that local network access remains active by attempting login from a local device.
Finalizing and Testing Remote Access
With DDNS and SSL configured, and account restrictions in place, remote access to the Synology NAS is now securely available via https://yournasname.synology.me:5001. Regular monitoring of DDNS status, firewall settings, and DSM access logs (found under Control Panel > Security > Security Advisor) is recommended to maintain security and connectivity.
Written on November 3rd, 2024
Using an SSL Certificate for Secure Access to Synology NAS: Reusing Across DDNS and HTTPS Services
To ensure secure access to Synology NAS, a single SSL certificate can be configured to cover both DDNS and web-based HTTPS services. Reusing an SSL certificate across multiple services is achievable with attention to several key requirements, enhancing security and ensuring a seamless experience for users accessing the NAS via HTTPS.
Key Considerations for SSL Certificate Reuse
Domain Name Consistency
The SSL certificate must match the exact domain name used for both DDNS and web-based HTTPS access. For example, if meta-ngene.org is the primary domain, the SSL certificate should be issued specifically for meta-ngene.org. This will ensure compatibility and trustworthiness across all services that utilize this domain. Using myusername.synology.me would require a separate certificate if this domain is also actively used.
Certificate Type and Authority
A standard SSL certificate issued by a reputable Certificate Authority (CA), such as Let’s Encrypt, can typically be reused across services. Certificates issued by Synology’s free Let’s Encrypt integration are suitable for this purpose, as long as they cover the intended domain name. Self-signed certificates may also work but can result in browser security warnings, especially for external access.
Trusted CA for Compatibility
To avoid compatibility issues, it is recommended to use an SSL certificate from a trusted CA. Let’s Encrypt is widely supported, and Synology NAS makes obtaining and renewing certificates straightforward. This ensures that users can access the NAS without security warnings across various platforms.
Steps to Reuse an SSL Certificate for HTTPS on Synology NAS
Step 1: Obtain or Install the SSL Certificate for meta-ngene.org
If an SSL certificate for meta-ngene.org is already active on Synology NAS for DDNS, confirm that it is properly matched to this domain.
To obtain a certificate, navigate to Control Panel > Security > Certificate:
From here, request a new certificate from Let’s Encrypt or import an existing certificate if purchased from a third-party CA. Ensure it is explicitly issued for meta-ngene.org.
Step 2: Configure Services to Use the SSL Certificate
Under Control Panel > Security > Certificate, go to Configure and assign meta-ngene.org as the SSL certificate for both DDNS and HTTPS web services (such as Web Station).
Select meta-ngene.org from the dropdown menu for each relevant service.
Apply these settings to ensure the SSL certificate is active for all services associated with meta-ngene.org.
Step 3: Update Network Settings if Replacing myusername.synology.me with meta-ngene.org
If meta-ngene.org is to replace myusername.synology.me for accessing Synology NAS, adjust the NAS’s network configuration to recognize meta-ngene.org as the primary domain.
Confirm that meta-ngene.org is reflected in all external access settings, ensuring that the SSL certificate covers every service and access point required.
Step 4: Verify HTTPS Access via meta-ngene.org
Test the secure connection by accessing the NAS via https://meta-ngene.org. Ensure that the SSL certificate is recognized without security warnings, verifying compatibility.
Repeat this verification for any web-based service using meta-ngene.org to confirm the SSL certificate’s applicability.
By following these steps, meta-ngene.org can serve as the primary secure domain for Synology NAS, allowing the SSL certificate to be reused effectively across both DDNS and HTTPS web services. This configuration ensures secure, consistent access across all designated NAS services.
Written on November 5th, 2024
SSH
Setting Up SSH Key-Based Authentication on Synology NAS Using an Existing SSH Key
SSH key-based authentication offers a more secure and convenient alternative to traditional password-based logins. By using cryptographic keys, unauthorized access is significantly reduced, and managing access across multiple servers becomes more efficient. This document outlines the necessary steps to configure a Synology NAS for SSH key-based authentication using an existing SSH key.
Step 1: Enabling SSH Access on Synology NAS
1.1 Access Synology DSM
Log in to the Synology DiskStation Manager (DSM) using an administrative account.
1.2 Navigate to Terminal Settings
Go to Control Panel > Terminal & SNMP.
1.3 Enable SSH Service
Under the Terminal tab, check the option Enable SSH service.
Confirm or change the SSH port number (default is 22).
Click Apply to save the settings.
Step 2: Preparing the Existing SSH Key
2.1 Locate the Public Key
The public key is typically located at ~/.ssh/id_rsa.pub on the local machine.
2.2 Display the Public Key
Use the following command to display the public key:
cat ~/.ssh/id_rsa.pub
Copy the entire output, including the ssh-rsa prefix and any key comments.
Step 3: Copying the SSH Public Key to Synology NAS
Step3.1: Using ssh-copy-id Command
Note: This method assumes that the ssh-copy-id utility is available on the local machine.
3.1.1 Install ssh-copy-id (If Necessary)
For Debian/Ubuntu Systems:
sudo apt-get install ssh-copy-id
For macOS with Homebrew:
brew install ssh-copy-id
3.1.2 Execute ssh-copy-id
Run the following command, replacing username and nas_ip_address with the appropriate values:
Enter the password for the NAS account when prompted. This command appends the public key to the authorized_keys file on the NAS.
Step3.2: Manual Copying of Public Key
If ssh-copy-id is unavailable, the public key can be copied manually.
3.2.1 Access the NAS via SSH
Log in to the NAS using SSH with the existing username and password:
ssh username@nas_ip_address
3.2.2 Create the .ssh Directory
Ensure you are in the home directory and create the .ssh directory if it does not exist:
cd ~
mkdir -p .ssh
chmod 700 .ssh
3.2.3 Add the Public Key to authorized_keys
Open or create the authorized_keys file and paste the copied public key:
nano .ssh/authorized_keys
After pasting the key, save and exit the editor. Then, set the appropriate permissions:
chmod 600 .ssh/authorized_keys
Step 4: Testing SSH Key-Based Authentication
4.1 Log Out of the NAS
Exit the current SSH session:
exit
4.2 Attempt SSH Login with Key Authentication
Attempt to log in again using SSH. If configured correctly, access should be granted without prompting for a password:
ssh username@nas_ip_address
If access is successful without a password prompt, SSH key-based authentication is properly configured.
Step 5: Configuring Synology NAS for Enhanced SSH Security
5.1 Verify SSH Configuration File (Optional)
The SSH daemon configuration file is located at /etc/ssh/sshd_config on the NAS. Adjusting settings in this file can further enhance security.
5.2 Disable Password Authentication (Optional)
To prevent password-based logins and enforce key-based authentication, modify the SSH configuration as follows:
5.2.1 Open the SSH Configuration File
sudo vi /etc/ssh/sshd_config
5.2.2 Modify Authentication Settings
Locate the line containing PasswordAuthentication and set it to no:
PasswordAuthentication no
5.2.3 Save and Exit
After making the changes, save and exit the editor.
5.3 Restart SSH Service
Apply the configuration changes by restarting the SSH service:
sudo synoservice --restart sshd
Warning: Disabling password authentication will prevent login using passwords. Ensure that SSH key authentication is functioning correctly before implementing this change.
Secure SSH Access, Shared Folder Management, and Disabling Password-Based Login on Synology NAS
Synology NAS offers SSH-based access for file management, security configurations, and software installation, including advanced customizations not accessible through the DSM interface alone. Below is a comprehensive guide detailing SSH navigation, secure login settings, and Emacs installation on a Synology NAS.
Accessing Shared Folders on Synology NAS via SSH
To manage shared folders through SSH, begin by navigating to the directory where Synology NAS typically mounts shared folders. On Synology systems, these shared folders are located under /volume1 by default, although configurations may vary depending on the system setup.
1. Log in to the NAS via SSH
ssh frank@nas_ip_address
2. Navigate to the Shared Folder Directory
Move to the primary volume directory with:
cd /volume1
3. Access a Specific Shared Folder
To enter a specific shared folder, use:
cd /volume1/shared_folder_name
Within this directory, files and subdirectories can be accessed and managed according to the permissions granted to the frank account.
Disabling Password-Based SSH Authentication on Synology NAS
For added security, it is advisable to disable password-based SSH authentication, allowing only key-based access. This procedure involves editing the SSH configuration file to permit only SSH key login. Access to the SSH configuration file is required to implement this change.
1. Log in to the NAS via SSH with an SSH Key
ssh frank@nas_ip_address
2. Edit the SSH Configuration File
Access the SSH daemon configuration file:
sudo vi /etc/ssh/sshd_config
3. Disable Password Authentication
Locate the line:
#PasswordAuthentication yes
Remove the # if present and change yes to no:
PasswordAuthentication no
4. Save and Exit the File
In vi, press Esc, type :wq, and press Enter to save and close.
5. Restart SSH Service
Apply the new settings by restarting SSH:
sudo synosystemctl restart sshd.service
If synosystemctl is not supported on the current DSM version, consider rebooting the NAS:
sudo reboot
- Written on November 4th, 2024 -
Network Separation
Integrated Deployment for Synology DS723+ and DS423+
1. Introduction
Synology NAS devices provide versatile, scalable solutions for data storage, backup, and a wide array of network services. Among these, the DS723+ and the DS423+ stand out as robust and complementary models capable of forming an adaptable and secure multi-NAS ecosystem. This document merges key insights from multiple discussions to deliver:
A two-NAS architecture focusing on a DS723+ (with external connectivity) and a DS423+ (secured in an internal environment).
Network separation to enhance security by preventing unauthorized access to critical data.
RAID configurations and expansions, including initial RAID setups (RAID 1) and subsequent transitions (e.g., RAID 5).
Hot-swapping processes and guidelines on when to power down.
Performance improvements through memory (RAM) and SSD cache upgrades.
Security considerations for internet-exposed deployments, including best practices for authentication, firewall settings, and backups.
This integrated reference aims to minimize omissions of important ideas while refining and organizing content for professional publication.
2. Overview of the DS723+ and DS423+
Synology DS723+
Compact 2-Bay NAS: Tailored for higher-performance tasks in environments where physical footprint is limited.
Enhanced Processing and Memory Ceiling: Supports up to 32 GB RAM and NVMe SSD caching, beneficial for virtualization (Virtual Machine Manager), Docker containers, and active file sharing.
Ideal Use Cases: Hosting containers, web services, external file sharing, and collaboration platforms.
Synology DS423+
4-Bay NAS with Larger Capacity: Accommodates up to four HDDs, providing ample storage for shared folders, backups, and archival data.
RAID Flexibility: Natively supports RAID 5, RAID 6, or Synology Hybrid RAID (SHR) with single- or dual-disk fault tolerance.
Recommended Use Cases: Central backup repository, high-capacity file server, or local-only data storage with no external exposure.
Key Synergy: When combined, the DS723+ can serve as the performance-driven primary node for daily operations (including internet-facing access), while the DS423+ offers large, redundant storage with minimal exposure to external threats.
3. Network Separation and Security
Rationale for Using Two Separate NAS Units
Security Through Isolation
Placing the DS423+ entirely on an internal network (with distinct IP ranges and no public port forwarding) greatly reduces the risk of external intrusion.
The DS723+ manages external-facing services, protected by firewall rules, VPN configurations, or QuickConnect, ensuring more controlled exposure.
Flexibility and Redundancy
Each NAS operates on a separate DSM instance with dedicated resources.
A security incident or malfunction on the DS723+ is less likely to affect the DS423+, preserving critical data integrity.
Comparison with Direct Expansion
Synology’s DX517 is an expansion unit for certain models, attaching via eSATA and extending the primary NAS’s storage pool.
A DS423+, however, remains fully independent, benefiting from its own CPU, memory, and DSM environment. This approach can be more expensive but confers stronger fault isolation and simplifies disaster recovery scenarios.
Security Measures for External Access
Avoid Direct Port Forwarding: Use Synology QuickConnect or a VPN server (OpenVPN, WireGuard, etc.) to encrypt remote sessions.
Multi-Factor Authentication (MFA): Enforce two-factor authentication for administrative or user logins.
Disable Default Admin Account: Rename or remove the default admin account and enforce strong password policies.
Regular Updates: Keep DSM, packages, and antivirus tools updated, and run Security Advisor to detect potential vulnerabilities.
Firewall and Geofencing: Restrict inbound traffic to known IP ranges to limit brute-force attacks.
4. RAID Configurations and Expansions
Synology NAS supports multiple RAID types, each balancing performance, redundancy, and capacity. The following table summarizes frequently used RAID levels with example capacities using 12 TB HDDs:
RAID Type
Min. Disks
Approx. Usable Capacity
Fault Tolerance
RAID 0
2
Sum of all disk capacities
None (0-disk failure)
RAID 1
2
Single disk capacity (mirroring)
1 disk can fail
RAID 5
3
(Number of disks − 1) × capacity
1 disk can fail
RAID 6
4
(Number of disks − 2) × capacity
2 disks can fail
RAID 10
4
Half of total disk capacity
1 disk per mirrored pair
SHR
2
Flexible (depends on disk sizes)
1 or 2 disks (SHR-2)
RAID 1 (2 × 12 TB)
Total of ~12 TB usable with 1-disk fault tolerance.
Recommended for smaller environments with higher redundancy needs.
RAID 5 (3–4 disks)
Balances capacity, performance, and 1-disk fault tolerance.
More advanced redundancy (2-disk fault tolerance in RAID 6 or improved performance in RAID 10).
Synology Hybrid RAID (SHR)
Automatically optimizes capacity when mixing different drive sizes.
Can be configured for single- or dual-disk redundancy.
5. Example Deployment and RAID Migration
DS723+: External-Facing NAS
Recommended RAID: RAID 1 with 2 × 12 TB drives for fault tolerance.
Rationale: Maintains availability even if one disk fails, critical for externally accessible services.
Performance Upgrades (Optional):
RAM Expansion: Up to 32 GB for running multiple Docker containers, Virtual Machine Manager, or concurrent file-sharing sessions.
NVMe SSD Cache: Significant improvement for random reads/writes (e.g., databases, log-intensive services).
DS423+: Internal-Only NAS
Initial RAID Setup: 2 × 12 TB in RAID 1 to learn basic Synology operations.
Subsequent RAID Migration: Add a third 12 TB disk, hot-insert while powered on, and migrate RAID 1 → RAID 5 (Storage Manager → Storage Pool → Action → Change RAID Type).
Final Capacity: Approximately 24 TB usable (3 × 12 TB in RAID 5).
Primary Function: Secured data repository and backup location with no external exposure.
Hot-Swapping vs. Powering Down
Hot-Swap: Recommended for adding or replacing disks in RAID 1, 5, 6, or 10 arrays that provide fault tolerance.
Power Down: Advised when removing the only disk of a single-disk volume, or when multiple disks require simultaneous removal.
Disk Wipe/Preparation: Before repurposing any HDD, consider securely erasing old partitions in DSM (Storage Manager → Wipe Disk) to avoid metadata conflicts.
6. Backup Strategy and Roles
DS423+ as a Dedicated Backup Repository
Centralized Backup: Consolidates backups from PCs, servers, or the DS723+ using Synology Hyper Backup, Snapshot Replication, or Active Backup for Business.
Redundancy: RAID 5 or RAID 6 ensures data remains available even if disks fail.
Long-Term Storage: Larger capacity (4 bays) provides room to scale for future growth.
DS723+ as the Primary NAS
Frequent Backup Schedules: Since RAID 1 (or RAID 0) can still fail under certain conditions, daily or weekly incremental backups to the DS423+ are prudent.
Offsite Copy: Consider replicating critical data to a cloud service (e.g., Synology C2) for disaster recovery.
Significantly reduces latency for random read/write scenarios
Large Sequential
Cache can fill quickly; benefits may be moderate unless well-tuned
Database Hosting
Ideal for transaction-intensive workloads requiring quick response
Model Example: Synology SNV3410-400G (M.2 NVMe).
Written on December 31, 2024
Removing Shared Folders and Enabling Private Directories on Synology NAS 423+ for Internal Network Separated from External IP Access
This guide provides comprehensive instructions for removing shared folders and enabling private directories on a Synology Network Attached Storage (NAS) device. Additionally, it includes steps to configure a recycle bin, ensuring data privacy and protection against accidental deletions.
Prerequisites
Administrative Access: Ensure that administrative privileges are available to perform the operations.
Data Backup: It is recommended to back up important data before proceeding with deletion or configuration changes.
Removing Shared Folders Using DSM Web Interface
The DiskStation Manager (DSM) offers a user-friendly web interface for managing shared folders.
Step 1: Log in to DSM
Open a Web Browser:
Launch your preferred web browser.
Access DSM Login Page:
Enter the IP address of the Synology NAS in the address bar.
Authenticate:
Enter the administrative credentials to log in.
Step 2: Access Control Panel
Navigate to Control Panel:
From the DSM desktop, click on the Control Panel icon to open the settings.
Step 3: Navigate to Shared Folder Settings
Select Shared Folder:
In the Control Panel, click on Shared Folder under the File Services or Privileges section.
Step 4: Select and Delete the Shared Folder
Locate the Shared Folder:
In the Shared Folder window, identify the folder intended for deletion from the list.
Select the Folder:
Click on the desired shared folder to highlight it.
Initiate Deletion:
Click the Remove button located at the top of the page.
Step 5: Confirm Deletion
Confirmation Dialog:
A dialog box will appear, asking for confirmation to delete the folder.
Proceed with Deletion:
Click Yes to confirm the deletion.
Data Deletion Option:
If prompted, choose whether to permanently delete the associated data. Caution: This action is irreversible.
Enabling and Utilizing Private Directories
Transitioning to private directories enhances data privacy by restricting access to individual users. The following steps outline the process to enable private directories for the admin account and configure a recycle bin.
Step 1: Enable the Home Folder Feature
Log in to DSM:
Ensure that you are logged in with administrative credentials.
Access Control Panel:
Click on the Control Panel icon from the DSM desktop.
Enable User Home Service:
Navigate to User & Group > Advanced Settings.
In the User Home section, check the box labeled Enable user home service.
Click Apply to save the changes.
This action creates a private "home" directory for each user on the NAS.
Step 2: Access the Private Directory
Log in as the Admin User:
Ensure the admin account is active and has appropriate permissions.
Open File Station:
From the DSM desktop, launch the File Station application.
Navigate to Home Directory:
In File Station, click on the home directory to access the private space.
The admin can securely store files here, with access restricted to the admin account.
Step 3: Prevent Creation of Additional Shared Folders
To avoid creating unnecessary shared folders:
Review Shared Folder Settings:
Navigate to Control Panel > Shared Folder.
Delete Unnecessary Shared Folders:
Follow the steps outlined in the "Removing Shared Folders Using DSM Web Interface" section to delete any shared folders that are not required.
Restrict Shared Folder Creation:
Ensure that user permissions do not allow the creation of new shared folders unless necessary.
Step 4: Enable and Configure Recycle Bin
Setting up a recycle bin ensures that deleted files can be recovered in case of accidental deletion.
Access Shared Folder Settings:
Navigate to Control Panel > Shared Folder.
Edit Shared Folder Properties:
Select the home shared folder from the list.
Click the Edit button.
Enable Recycle Bin:
In the Edit Shared Folder dialog, locate and check the box labeled Enable Recycle Bin.
Configure Recycle Bin Settings:
Set desired parameters such as retention period for deleted files.
Apply Settings:
Click OK to save and apply the settings.
Verify Recycle Bin Functionality:
Test the recycle bin by deleting a test file within the private directory.
Ensure that the file is moved to the recycle bin and can be restored if necessary.
Written on January 3, 2025
Miscellaneous
Safely Shutting Down Synology NAS to Ensure Data Integrity
To safely shut down a Synology NAS and protect data integrity, the following steps may be observed. A careful shutdown process ensures that all ongoing tasks and connections are properly terminated, minimizing the risk of data corruption.
Step 1: Close Active Applications and Processes
Ensure that any active applications, file transfers, or scheduled tasks are completed or paused before proceeding. This step prevents data corruption by stopping ongoing activities prior to powering down.
Step 2: Disconnect Remote Connections
Notify any remote users about the planned shutdown to avoid disruptions.
Disconnect active remote sessions or connections to ensure that no user remains connected to the NAS.
Step 3: Perform a Graceful Shutdown via DSM Interface
Access the DiskStation Manager (DSM) interface.
Navigate to Main Menu > Shutdown.
Select Shut Down and confirm the action. This approach allows the NAS to close all processes in an orderly manner, safeguarding data integrity.
Step 4: Use the Power Button if DSM Is Unavailable
When DSM access is unavailable, press and hold the Power button on the NAS for approximately 3–5 seconds. This initiates a safe shutdown sequence, though using the DSM interface is preferable.
Step 5: Wait for Status Lights to Turn Off
Allow the NAS adequate time to complete the shutdown. Wait until the status and disk activity lights have turned off, indicating that all processes have ceased and the drives have stopped.
Step 6: Optional: Unplug the NAS
If the NAS is to remain off for an extended duration, unplugging it may prevent accidental power-on or electrical surges.
By following these steps, Synology NAS can be powered down safely, maintaining data integrity and reducing the risk of data loss or corruption.
Written on November 5th, 2024
Extending Session Timeout for Synology DSM Access
To address connection timeouts and ensure extended access to Synology DSM, adjustments can be made to the session timeout settings within the DiskStation Manager (DSM). This modification can enhance user experience by preventing unintended logouts due to inactivity. A step-by-step guide is provided below to assist in adjusting these settings in a precise and accessible manner.
Step 1: Access the DSM Control Panel
Begin by opening a web browser and entering the IP address of the Synology NAS (e.g., http://192.168.1.100). Proceed to log in using the appropriate credentials to access the DSM dashboard.
Step 2: Locate Security Settings
Within the DSM interface, navigate to the Control Panel. From the options available, select "Security" to access relevant configurations.
Step 3: Adjust the Login Timeout Setting
Within the Security section, open the "Login" tab (also known as Login Settings in some DSM versions). Here, find the "Logout Timer" option, which determines the duration of the session without interaction before automatic logout occurs.
Step 4: Set Desired Session Duration
Modify the timer to the preferred duration to ensure a stable and extended session. After selecting the new duration, click "Apply" to save the adjustments.
By following these steps to configure the Logout Timer within Security > Login Settings, DSM access can be maintained for an extended period without interruptions from auto-logout. This setting provides flexibility to meet varying access needs and ensures that workflow disruptions are minimized.
Written in November 6th, 2024
Understanding and Securing Synology NAS Activity During Off-Peak Hours
Concerns may arise when a Synology Network Attached Storage (NAS) device exhibits activity during periods of expected inactivity, such as the middle of the night. This document explores potential reasons for such behavior and addresses the possibility of remote access by Synology through its software, despite router configurations that restrict external access. Comprehensive steps for diagnosing and securing the NAS are also provided to ensure optimal performance and security.
Potential Reasons for NAS Activity During Off-Peak Hours
1. Scheduled Tasks and Maintenance
Automatic Backups: Backup operations, utilizing applications like Hyper Backup or Active Backup, are often scheduled during off-peak hours to minimize disruption. These tasks require the NAS to be active to execute the backup processes.
System and Package Updates: The NAS may automatically download and install system firmware updates or updates for installed packages (e.g., surveillance systems, media servers). This ensures that the device operates with the latest features and security patches.
Disk Scrubbing and Health Checks: Regular maintenance tasks, such as disk scrubbing and SMART tests, are performed to maintain drive health and data integrity. These processes are typically scheduled during periods of low activity.
2. Indexing and Media Services
File Indexing: To enhance search performance, the NAS indexes stored files. This process can be resource-intensive and is often conducted during times of minimal usage.
Media Scanning: Media services, such as Video Station or Audio Station, may scan for new media files to update libraries. This scanning process can activate the NAS to process and organize media content.
3. Antivirus and Security Scans
Antivirus applications installed on the NAS, such as Synology Antivirus Essential, may perform routine scans to detect and mitigate potential threats. These scans are typically scheduled during off-hours to reduce impact on system performance.
4. Active Services and Applications
Cloud Synchronization: Services like Synology Drive or Cloud Sync may synchronize data with cloud services during off-peak hours, necessitating NAS activity.
Surveillance Station: Continuous recording or processing of video footage by Surveillance Station can keep the NAS active throughout the night.
5. Network Activity from Internal Devices
Even with external access restrictions, devices within the local network—such as computers, smartphones, or smart TVs—may access the NAS for various services, leading to unexpected activity.
6. Hardware and Environmental Factors
Hardware Issues: Malfunctions in hardware components, such as fans, can cause the NAS to operate continuously, resulting in persistent noise.
Power Settings: Configurations that allow the NAS to wake from sleep or hibernation modes for maintenance tasks can lead to nighttime activity.
Assessing Remote Access Capabilities
Despite router configurations that prevent external IP access, understanding the mechanisms through which remote access is facilitated is crucial for ensuring NAS security.
Synology's Remote Access Mechanisms
QuickConnect: This feature allows remote access without the need for port forwarding by establishing an outbound connection to Synology’s servers. Access is controlled through QuickConnect IDs and user credentials, ensuring that only authorized users can connect. Synology itself does not have access to the data; it merely facilitates the connection.
Synology DDNS (Dynamic DNS): This service provides a domain name that maps to the NAS’s dynamic external IP address. When combined with port forwarding, it allows access via the provided domain name. Access control is maintained through user credentials and network configurations.
Synology’s Access to the NAS
By default, Synology does not access the NAS remotely. Remote access features require explicit user configuration and consent. Synology adheres to strict privacy policies, ensuring that user data remains inaccessible without authorization. Assistance from Synology Support for remote access necessitates user initiation and consent, typically involving temporary access under user supervision.
Securing the NAS Against Unintended Access
To ensure the NAS remains secure and operates as intended, the following measures are recommended:
Review and Manage Remote Access Settings
Disable QuickConnect: If not in use, QuickConnect should be disabled to prevent unsolicited remote connections.
Manage DDNS and Port Forwarding: Ensure that no unintended DDNS services are active and that port forwarding rules are correctly configured to block external access.
Configure Firewall and Security Settings
Firewall Configuration: Utilize the built-in firewall to restrict access to trusted IP addresses and block unauthorized traffic.
Enable Security Features: Activate features such as Auto Block to prevent brute-force attacks and regularly run Security Advisor to identify and mitigate vulnerabilities.
Disable Unused Services
Minimizing the number of active services reduces potential entry points for unauthorized access. Services like SSH, Telnet, or unnecessary web services should be disabled if not required.
Regular Updates and Maintenance
Keeping the NAS’s DiskStation Manager (DSM) and all installed packages up to date ensures that the latest security patches and features are applied, safeguarding against known vulnerabilities.
Monitoring and Diagnostics
Regular monitoring of the NAS’s activity can help identify and address unexpected behavior:
Log Center: Regularly review logs to monitor access attempts, system events, and other activities for any suspicious behavior.
Resource Monitor: Utilize Resource Monitor to observe real-time CPU, memory, disk, and network usage, aiding in the identification of active processes.
Enhancing Physical and Network Security
Network Segmentation: Placing the NAS on a separate VLAN or subnet can further restrict access and enhance security.
Strong Authentication: Implementing strong, unique passwords and enabling Two-Factor Authentication (2FA) adds additional layers of security to NAS user accounts.
Written on November 30th, 2024
Copying Files to an External USB Drive on a Synology NAS
1. Confirm the NAS Actually Sees the USB Disk
Log in as an administrator and open Control Panel ▶ External Devices.
If the disk is listed here, DSM has detected it. If it is not, swap the cable/port or try a powered USB hub (some 2.5-inch drives draw more power than the NAS supplies).
Look at the File System column:
“No file system” → click Format (choose ext4 for best performance/permissions on the NAS; NTFS works too; exFAT needs Synology’s exFAT add-on).
Healthy but still invisible in File Station → go to step 3 below.
Mount the drive if it shows “ejected.” The moment it is mounted DSM auto-creates a shared folder named usbshare1, usbshare2, etc.
Give yourself access: Control Panel ▶ Shared Folder ▶ usbshare1 ▶ Edit ▶ Permissions, then grant read/write to your user or group.
Once permissions are set, open File Station again—you should now see usbshare1 on the left.
2. Manually Copy Files in File Station
In File Station, browse to the folder on your NAS that you want to back up.
Select the files/folders, right-click ► Copy to / Move to ▶ Copy to… and pick usbshare1 as the destination.
Watch the transfer-progress bar to be sure the copy completes. (Large jobs copy faster if the NAS and drive are both on USB 3 ports.)
When finished, right-click the disk in File Station or External Devices and choose Eject before unplugging—this flushes caches and prevents corruption.
3. Automate or Schedule Copies with USB Copy (Optional)
If you need routine backups or a one-button workflow, install USB Copy from Package Center:
What to do
Where
Install USB Copy
Package Center
Create a task
USB Copy ▶ 「+」
Data Export task
NAS → USB drive
Choose copy mode
Mirroring (keeps an exact mirror), Incremental (adds/updates only), or Multi-versioned (time-stamped full copies)
Schedule or “copy on drive insertion”
Triggers tab
The quick workflow is: log in, mount or format the USB disk, open USB Copy, create a Data Export task, pick your source folder and usbshare1 as destination, choose a copy mode, then run or schedule it. USB Copy remembers each unique disk, so the next time you plug that drive in it can run the same task automatically.
4. If the Disk Still Refuses to Appear
Symptom
Things to Try
Not listed in External Devices
Different USB port (switch 2.0 ↔ 3.0), another cable, powered hub, or test the drive on a PC/Mac to rule out hardware failure.
Listed but “No file system” reappears after format
Drive may have multiple partitions—clean it on a PC (remove all partitions), then reconnect and format in DSM.
Appears, but File Station still empty
Check Shared-Folder permissions; be sure you’re logged in with a user that has rights to usbshare1.
Large > 16 TB disks
Make sure the drive is partitioned GPT; DSM can’t mount some legacy MBR layouts.
exFAT drive not mounting
Install Synology’s exFAT package or re-format to ext4/NTFS.
Connection drops during copy
Use a short certified USB 3 cable and avoid bus-powered enclosures that pull too much current.
TL;DR
Get the drive to show under Control Panel ▶ External Devices, format/mount it so DSM creates usbshare1, give yourself permission, then use File Station or USB Copy to move your files. You should now be able to copy—or even schedule automatic copies—without the drive disappearing again.